When starting a kitchen renovation, many housewives first think about finishing materials for walls and floors, how best to make an apron, what material to choose a countertop from, about hoods, furniture, etc. But when all the goods have already been purchased, the question becomes where to fit it all in a small kitchen, and even so that it is convenient. Comfort for the housewife in the kitchen can be ensured if you use simple rules for arranging furniture and kitchen appliances.
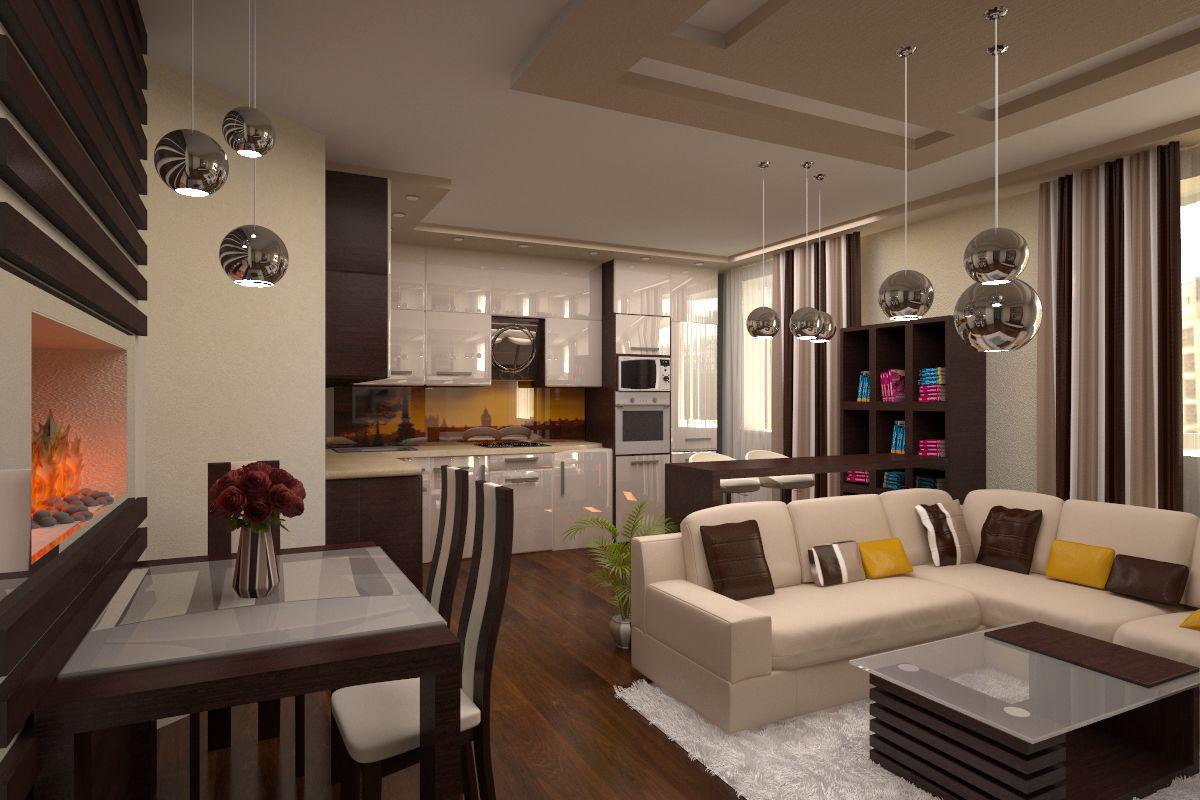
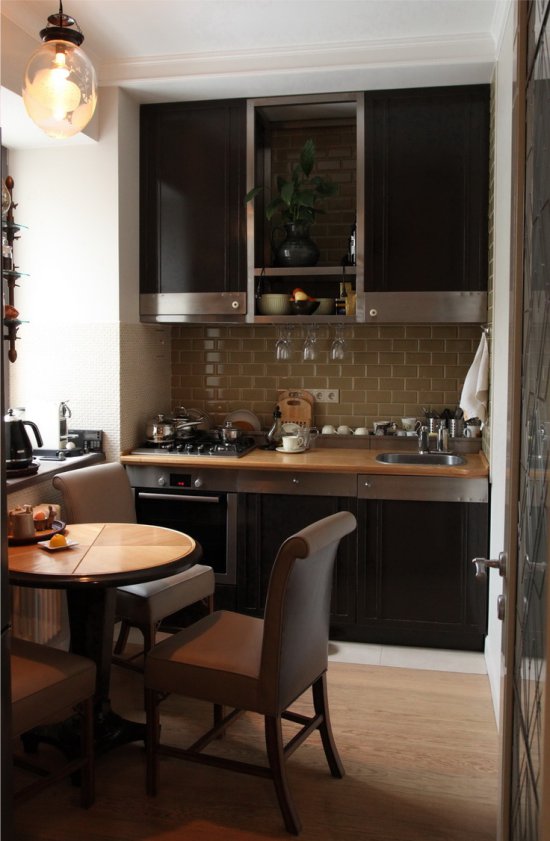
Peninsula kitchen layout
Although until the middle of the last century they were places of work that included only domestic service and housewives, they have now become one of the favorite places for communication between friends and relatives. This is why modern kitchen designs no longer just look for functionality, but also serve an aesthetic purpose and blend with the decoration of the rest of the house.
What elements should be considered?
Measurements: First of all, measure the size of your future kitchen well so that you don't have to remodel planes or return parts due to lack of space. He thinks that when it's time to cook, you'll need to move without too much difficulty, especially if you're working with more than one person at a time, so don't load it with too much furniture or appliances: we all love American refrigerators, while serving ice or sparkling water. but if the sizes decrease, we must forget to buy it.
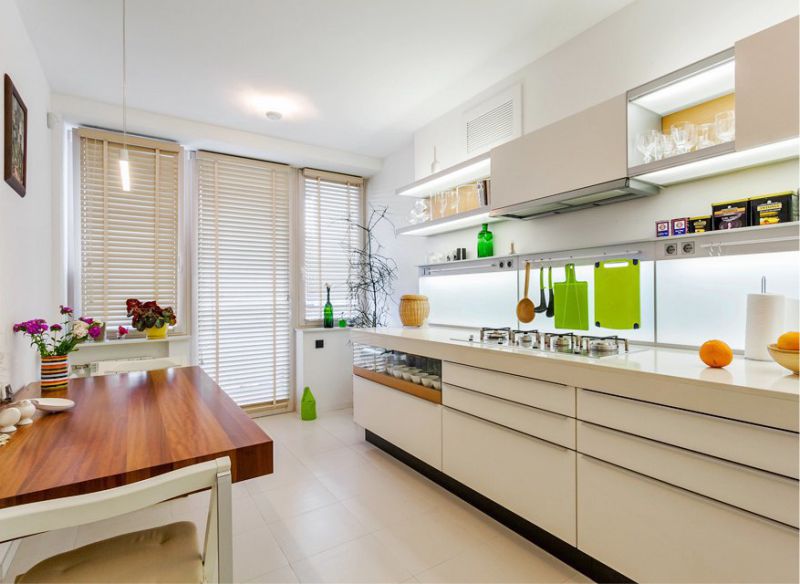
Ergonomic kitchen - convenient and comfortable. Not even large area the room is not cluttered
Regardless of the size of the kitchen area, before starting renovations, you need to draw a plan for the future kitchen on a piece of paper. Accurately mark the arrangement of everything that you want to place in this space. But don’t forget about the rules for arranging furniture, the observance of which will help you comfortably spend time preparing food.
Colors: We could have written hundreds of articles on this topic and still didn't have enough information to cover. And there are thousands of possible combinations, both patterns and materials, depending on the size and orientation of the kitchen, as well as, of course, decorating the rest of the house. If it's well oriented and you're getting a lot of light, you can play with darker colors, but if it's quite dark, you should push through whites and light colors.
Decorating your home: As we said in the previous point, you cannot forget that the kitchen is another room in your home and therefore its decoration should be in sync with the rest. Do you have a house in rustic style? So feel free to install country cuisine, as well as furniture and utensils made of wood or white, matching tiles and curtains in the windows.
The main rules for arranging furniture:
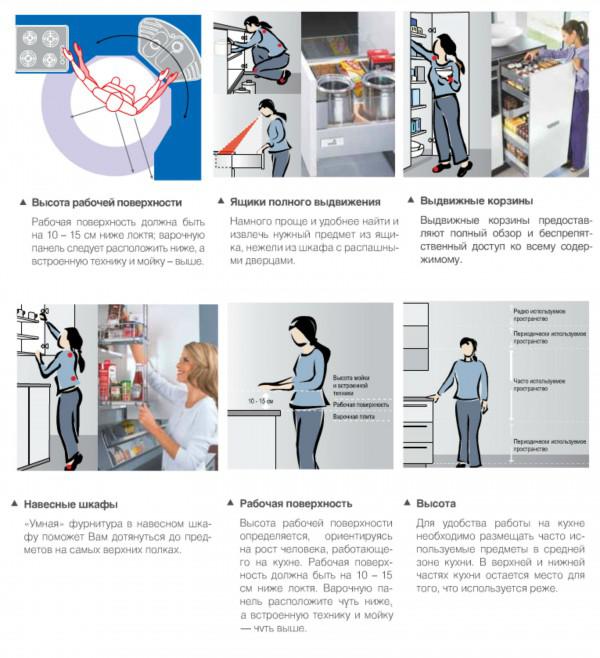
- Tabletop- This is the work area where the housewife spends the maximum amount of time, so this equipment is installed depending on her height. The most common height is 85 cm, but if tall owners find it uncomfortable, there is an option with a table top height of 90 – 100 cm. Determining the appropriate height is not difficult. To do this, bend the arm at the elbow 90°C parallel to the floor and measure 15 cm down.
- Dinner table selected lower than the tabletop. The most common height is 70 – 80 cm.
- Gas stove. For safety reasons, it is installed at least 50 cm away from open balcony doors or windows, where the flow of air can blow out the flames of the fire.
The option when the stove is in the corner is also not entirely suitable. The first reason is the distance of 7 cm from the wall, which is indicated in the instructions, which means that precious area is lost. Secondly, splashes that fall on the side wall are harder to clean than splashes that fall on the countertop.
Lighting: Good lighting is important for cooking without incident. If you have natural light, take advantage of it and plan the spread so nothing gets in the way of your circulation; But if not, choose low-wattage light sources and light different areas separately so you can better control your energy use.
Integrated kitchens: individual solution
Ventilation: This element is necessary, especially because it affects our health. Adequate ventilation will not only prevent odors from entering our clothes or furniture, but will also prevent respiratory diseases. In integral kitchens, the main idea is to optimize space, so furniture and appliances are - as the name suggests - integrated into the space without interfering with the aesthetic line of its design. A very common bet is to alter the front of a refrigerator or dishwasher so that it is confused by the naked eye with another piece kitchen furniture, and you don't see the recharged environment.

Any kitchen should be comfortable, first of all, for the person who works in it.
We arrange furniture and appliances
Most modern small kitchens are inalienable, since in the absence square meters we want to increase the functionality of these. Additionally, this type of design also works very well if you decide to open an open kitchen, as it will look like another stay larger than your home.
Other ways to optimize space in a small kitchen
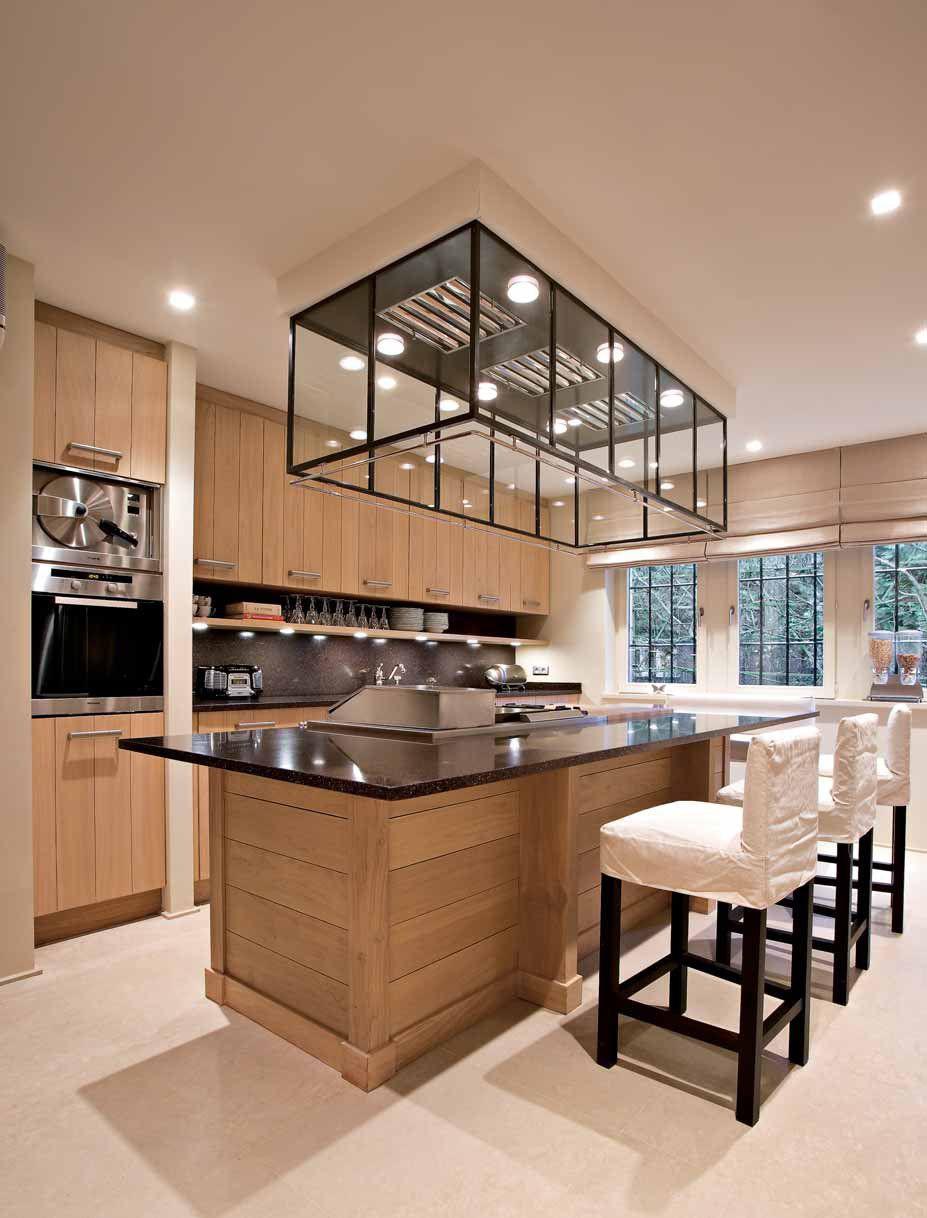
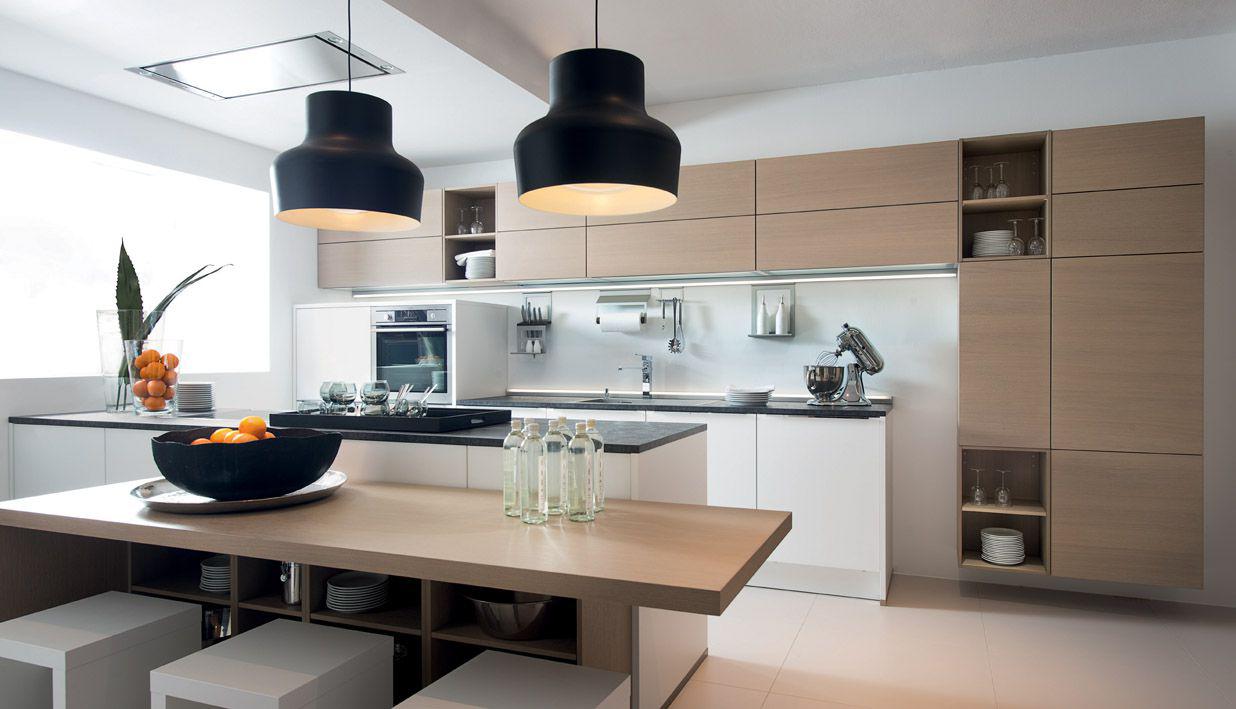
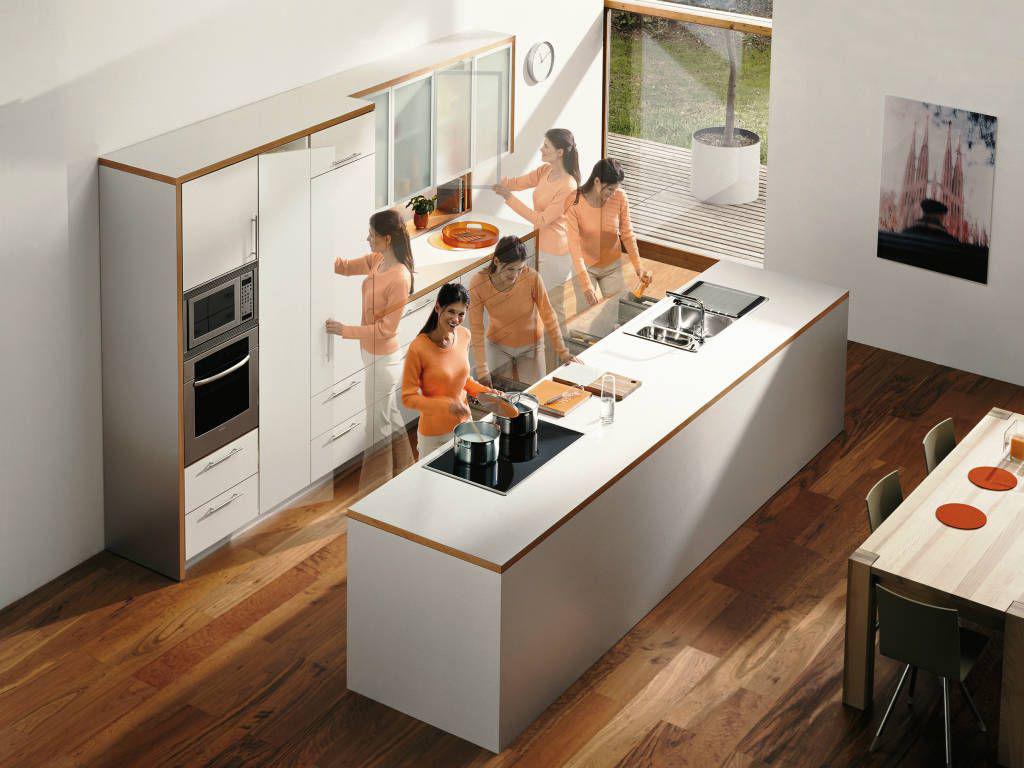
Another example of functional decoration for this type of kitchen is placing a center island that serves work surface at the same time as a bar, which helps save space, especially if you cannot accommodate a dining room. Start at the entrance: add a sliding door and gain one more square footage of space. There are many types and materials, but if they are made of glass, you will also get natural light.
- The hood is also mounted depending on the height of the owners. The most common option is 60 - 70 cm in height from the stove. Taller people set it 10–15 cm higher. But with this type of installation, the rule is that the higher the hood, the more powerful it should be.
- The kitchen sink is deep and the faucet is tall, This will allow you to place larger pots in it. Do not forget that the sewer riser should be located no more than 2.5 meters from the sink.
- The dishwasher fits best near the sink, which will make it easier to connect to the utilities.
- The best place for a refrigerator is a corner, and to make it more convenient to use without taking up extra space, you need to hang the door so that it opens towards the nearest wall ( modern models refrigerators have such a function as reversing the doors).
When choosing an option with furniture arrangement, you should immediately exclude the decision where the sink will be located next to the gas stove. Any splashes that may fall on the hot surface of the frying pan will begin to splatter intensively.
Another trick is to use the height of the walls to place tall modules that increase our capacity. Of course, not groceries: just putting them on one of the walls is enough. Betting on light colors both on the walls and on the furniture will give us a greater sense of space, as well as the choice of several materials. One for the floor, one for the walls, and one for the walls will suffice. Of course, you should keep the area clean at all times, as dirt becomes much more visible in transparent kitchens.
Which kitchen design style is best for me?
Choose small household appliances. Instead of the traditional 60cm, opt for 40cm-wide dishwashers, ovens and washing machines, as well as dual-burner cooktops and single-sided sinks. There are several decorative styles that you can follow, but improve the users, especially as follows.
How to plan a kitchen correctly in our video:
Triangle layout

Functionality is important in them: nothing is too much. Neutral tones, often accompanied by bright touches on chairs, cutlery and tableware, often dominate. As for furniture, they are simple, straight, and usually have a bar or kitchen island in between that serves for eating or as an additional work surface.
Kitchen layout options
Here, order and organization are everything, so its design is simple and elegant. These types of kitchens are dominated by the use of several decorative items and light colors, as well as good lighting. With these 9 tips on how to plan your kitchen, we want you to dream of your dream kitchen in a real way, without idealization, but with all those details that make it unique and personal, different and, above all, useful.
Triangle rule: refrigerator, sink, countertop on top.
The rules of ergonomics for the kitchen are important, but in order to be able to better optimize the work process, there are also the rules of the triangle. Let’s try to understand in more detail what these rules are.
There are three vertices in the working triangle, which play a major role in zoning:
Firstly, to clear the space that we have. While we love magazine kitchens, you have to understand that in a real kitchen you can't put every drawer or door because it's so important to use every piece of furniture. The kitchen should also be ergonomic and easy to use. Respecting the distances between the sink and the slabs is essential for good use. Comfort is a must in our kitchen.
With sufficient lighting, you will increase the overall kitchen space and it will be larger. Also, if you place lighting under tall furniture, it will encourage work on the counter and your eyes will thank you. The color of the kitchen will also help us bring light and reflect our personality or taste. The type of material you choose depends on personal taste, there are many door materials available today with good long-term results.
- the first peak is food storage, namely the refrigerator;
- the second vertex is the sink, where food is prepared for cooking;
- and to prepare food, of course, you need a stove, which acts as the third peak.
To achieve maximum convenience, all vertices should be close to each other, this will save the housewife from unnecessary running around the kitchen.
Sometimes it is difficult to choose one thing, but for this we decorators and professionals will put all your ideas in the oven to give us a rich sponge cake. Working from above in the kitchen is essential. In a real kitchen, as a rule, there is a lot of space, kitchens in apartments or small apartments, so it is very important for storage.
Household appliances are sometimes a little sick, and this is very important element in planning your kitchen. There are many, up to 7 or 8: Frigo, plates, oven, micro, hood, Dishwasher, washing machine and sometimes even dryer. Of these, the storage we will use largely depends. That's why our advice is: if you can fit washing machine and a dryer on the balcony or in the bathroom, don’t be shy.
The location of this equipment nearby is also unacceptable for safety reasons. The most optimal distance is 60 cm.
Since the head of the entire work process is the sink, it is she who takes pride of place in the center. A refrigerator and stove are installed on either side of it.
The action of the working triangle in different kitchen layouts:
Area Ergonomics Comfort Lighting Colorful style Storage counter. . If you decide to put yourself in your own hands, tell us your ideas and your needs, show us the space we are going to occupy and we will work and we will try to make the most of it to give you the kitchen of your dreams. Before you start designing, the most important thing is to understand how you are going to use the kitchen. This is a basic approach that any architect should follow. Because the kitchen cannot be a surplus space or just a space that will be defined at the end of the project; You must understand that there are threads, different areas of work that need to be completed as part of the overall project.
- Linear kitchen. The triangle is placed on one side of the kitchen. A sink is installed in the center, and on both sides of it, a work table and only then a refrigerator and a stove.
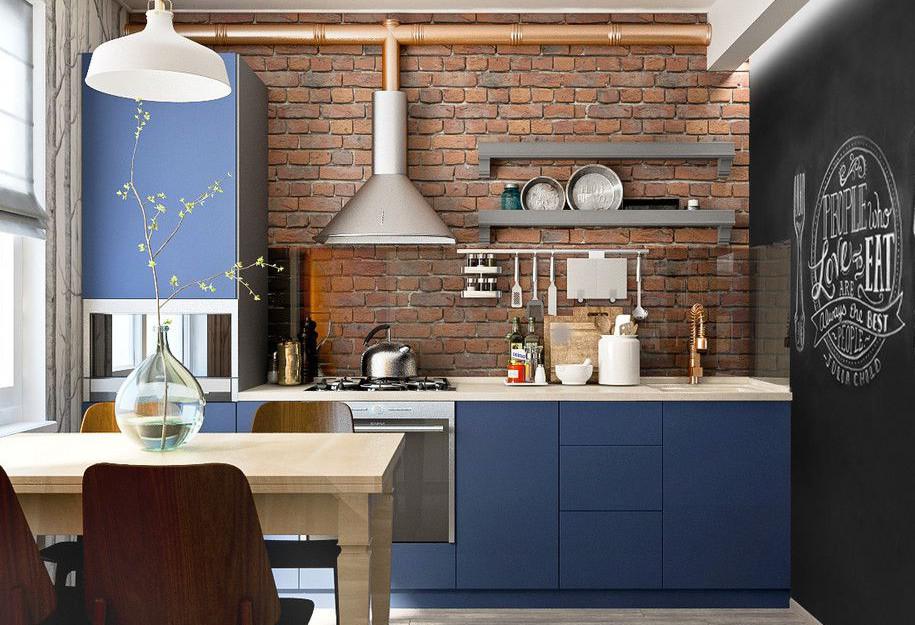
Linear kitchen
- An elongated “two-row” kitchen. Since all the furniture is placed on both sides, the tops are also placed accordingly. A good option will be when the sink and stove are on one side, and the refrigerator on the other. At the same time, we maintain the distance between the rows, which should not be less than 120 cm.
Apart from the style or design required by the client, it is important to define a specific modulation that allows optimizing its performance and thus minimizing the production costs of its various elements. Therefore, the measurements of all kitchen components need to be understood and internalized before determining the space in which they will be placed.
There are a number of studies that have identified 5 general areas for cooking food.
- Pantry: food storage space, canned goods, refrigerator.
- Storage: artifacts, dishes, work tools.
- Sink: cleaning.
- Preparation: Ideally a large hotel.
- Cooking: cooks and oven.
A two-row kitchen is more suitable for narrow kitchens.
- U-shaped kitchen. The furniture occupies three walls, which means the tops are installed accordingly. The middle row is a suitable place for a sink, and the two opposite ones are for a refrigerator and stove.
Photos of kitchen layouts
They are associated with the space intended for design. The most used typologies include. Linear. . Regarding these configurations, it is important to understand how the different circulations work. The work triangle should be kept fluid and cross circuits should be avoided when more than one person is working. At this stage it is always good to ask yourself the question: how would you like to use your kitchen? Or what aspects am I most concerned about or do I like my current kitchen?
U-shaped kitchen for large spaces
- The kitchen is L-shaped. The most common and convenient kitchen option. The sink is placed in the corner in the center, and the stove and refrigerator are on either side of it.
L-shaped kitchen is the most convenient
Kitchen layout tips from designers in our video:
This way we can design our spaces with meaning. 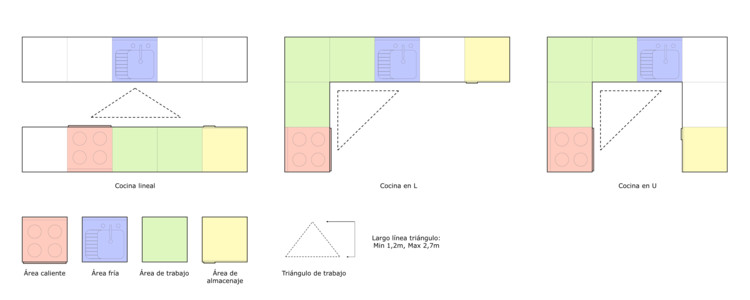
When designing and developing planimetry, it should be borne in mind that the kitchen is not just a random combination of a series of furniture and artifacts, but is formed from modules that must follow the logic of production. If the design is unclear or does not adhere to certain reasonable parameters that may arise, conflicts may arise between the architect and the furniture manufacturer.
It is the L-shaped version of the kitchen that best zones the space, where the dining area and food preparation area are clearly visible.
The owners have a small and narrow kitchen They are often disappointed when trying to fit all the modern technology into it. You can save space for the necessary equipment using a few tricks. The main thing is to use every unused centimeter. Namely:
A small kitchen should be comfortable
- if possible, you can expand the window sill, which will make a wonderful tabletop;
- every centimeter between the existing cabinets can be used for different shelves;
- It is advisable to select furniture that is multifunctional;
- It would be nice to have all the doors in a sliding version or to open them up;
- Furniture that has transparent tabletops and backs will visually help increase the space;
- the door to the kitchen is made with an arch or a sliding option;
- It is better to place the dishwasher and washing machine under the countertop;
- you can allocate a place for the microwave behind the front of the cabinet;
- we use high walls where additional cabinets are mounted;
- cabinets can be replaced with wall cabinets.
Rules comfortable kitchen and space saving:
Rails and lockers for maximum convenience
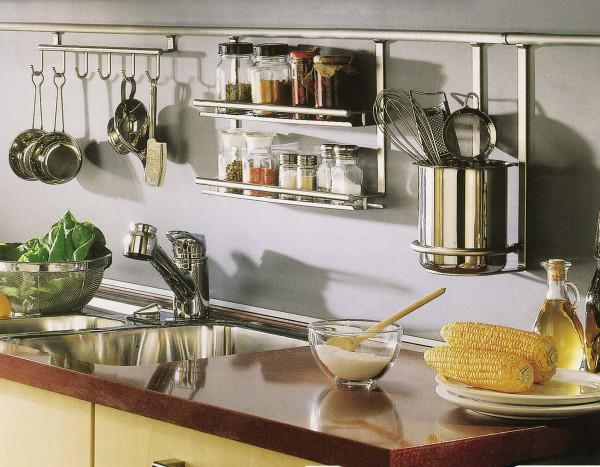
Rails are one of the most convenient devices in the kitchen
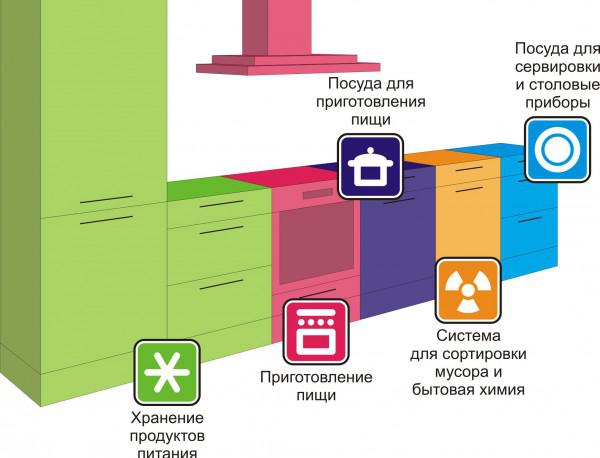
Conveniently placing all kitchen furniture and utensils is not difficult if you think about what the housewife uses very often, what less and what rarely. For example, it has already been determined that The sink is always installed in the center.
Next to the sink there should be a cabinet for freshly washed plates, cups, spoons etc. It is advisable that Under the sink there was space allocated for a trash can and household chemicals.

It is best to place jars of herbs and spices near the stove.
Near the stove there are cabinets: the bottom ones for storing pots, pans, etc., and the side ones for cereals, seasonings and other small things needed for cooking. The upper cabinets are reserved for kitchen utensils, which are rarely used. The lower ones are for heavy objects, but to place ladle, knives, oven mitts and other small items, you can use not a cabinet, which will have to be constantly opened, but railing.
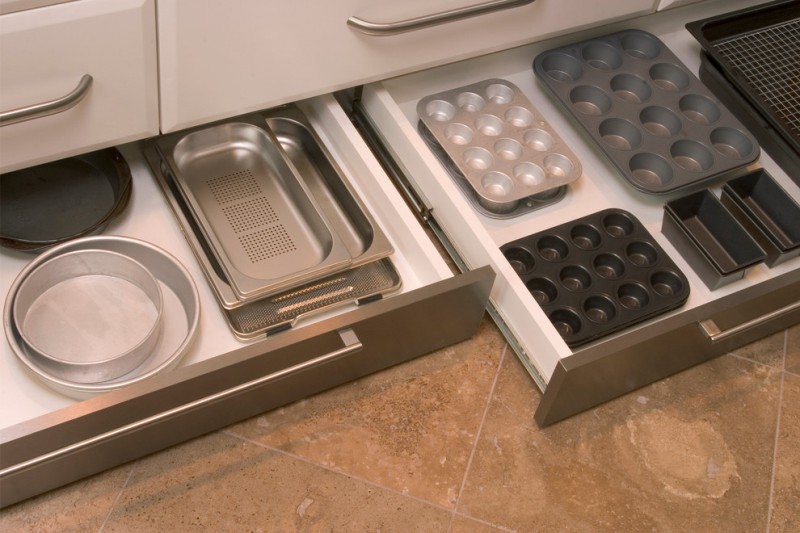
Take care of convenient storage of large dishes
When putting things in order in the kitchen, it’s worth thinking carefully about the fact that many things may no longer be needed at all and are just wasting space.
Rules for using railing:
- near the work table there are various hooks for work boards, ladle, ladles;
- holders for potholders and an electric lighter are fixed near the stove, but it is better to move various skimmers and spoons away from it to avoid contamination from splashes;
- a holder with compartments for spices is also attached next to the stove;
- It is better to place paper towels and glass holders near the sink.
Accessories that are not used often are put away at the very edge of the railing or even stored in a cabinet.
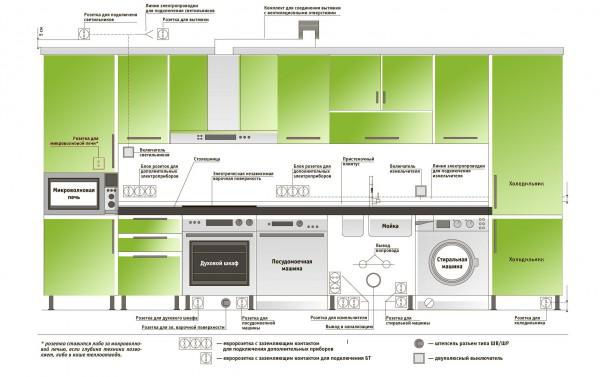
It is important that the sockets are placed correctly for convenience.
Click to enlarge
Comfortable kitchen, modern appliances:
Zoning
Click to enlarge
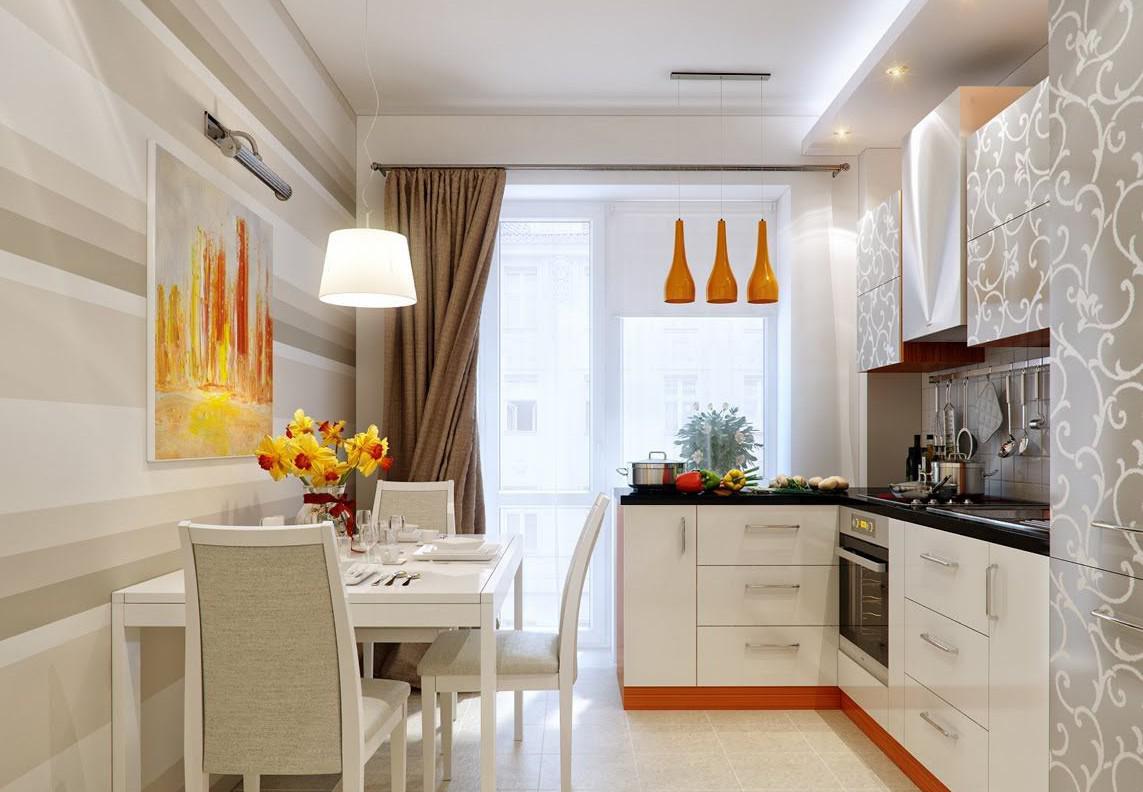
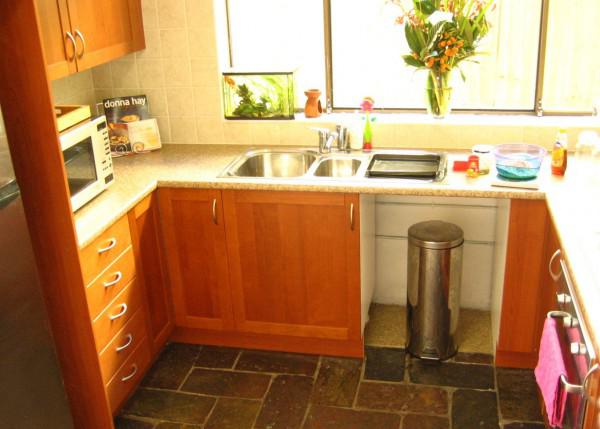
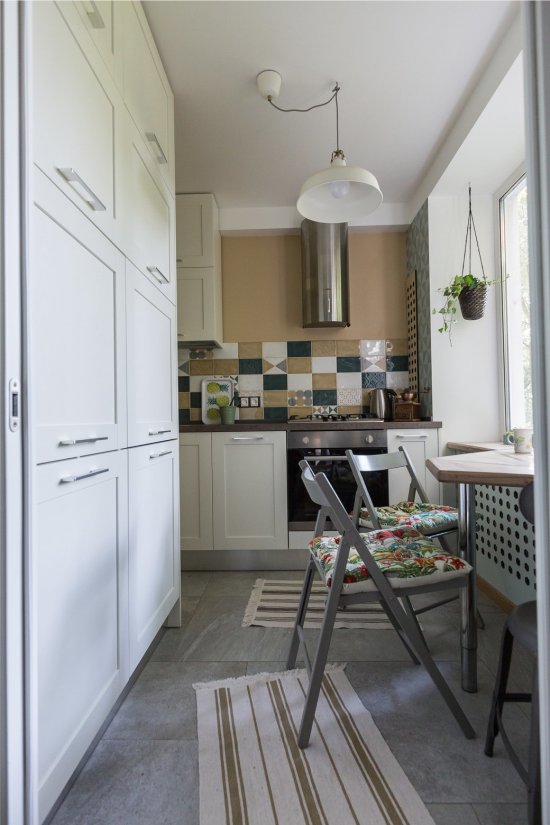
Order and maximum comfort in the kitchen can be achieved if the entire space is divided into zones that will be responsible for a specific task. Most often, the kitchen is zoned into: a work area, a dining area and an area for storing food..
- The work area is the space where food preparation takes place.. This is where the appropriate kitchenware, and not near the refrigerator or dining table.
- Storage area accommodates a refrigerator, where frozen and perishable foods are stored, and a pencil case next to it. It stores products that do not require low temperatures, as well as various containers, bags, napkins, etc.
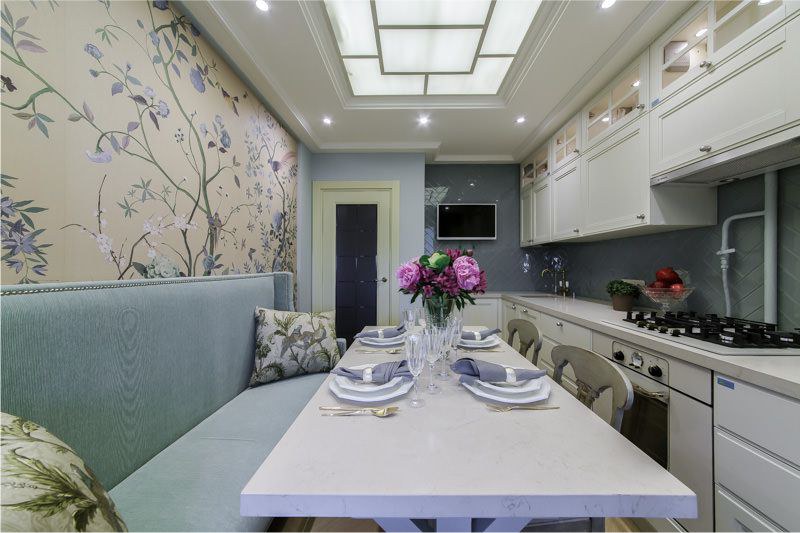
- Ideally, the dining area should be in another room, and not in the kitchen, but, unfortunately, this option is not suitable for everyone due to the small area of the apartment. For dining area All you need is a table and chairs.
If the work area and storage area can be combined into one by simply placing them next to each other, then the dining table along with chairs will interfere with movement during the work process.
Zoning the space can be done with the help of a cabinet that will stand across and clearly draw a line. If there is not enough space for a closet, you can create an arch from plasterboard. A bar counter would also be a good option, which will clearly separate the work area from the relaxation area. There are many options for zoning space; houseplants and properly selected lighting. It all depends on the size of the kitchen and the imagination of the owners.
Bar counter for zoning
Modern designers offer many options on how to properly furnish a kitchen, how to zone the space and how to use every free centimeter. But if the owners litter the area with useless utensils, then no rules will apply. For example, having a grill function in the oven, some people buy equipment with a similar function. Having a separate blender and mixer, for some reason you buy a food processor with the same properties, etc.
![]()
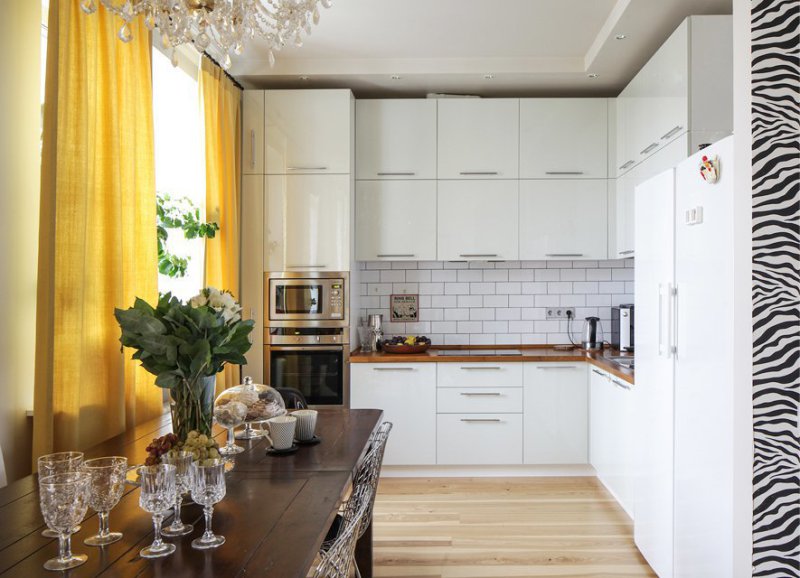
Kitchen border - dining table
A decorative wall separates the kitchen and living room
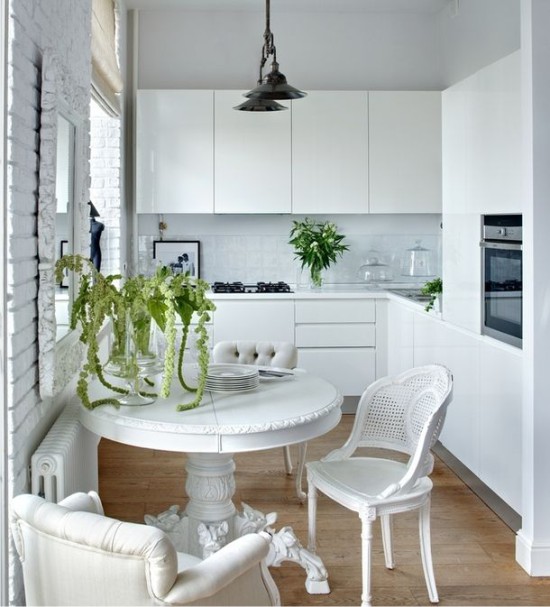
Small kitchen according to all the rules
A large kitchen should also be properly equipped so that you don’t have to walk kilometers around a spacious room
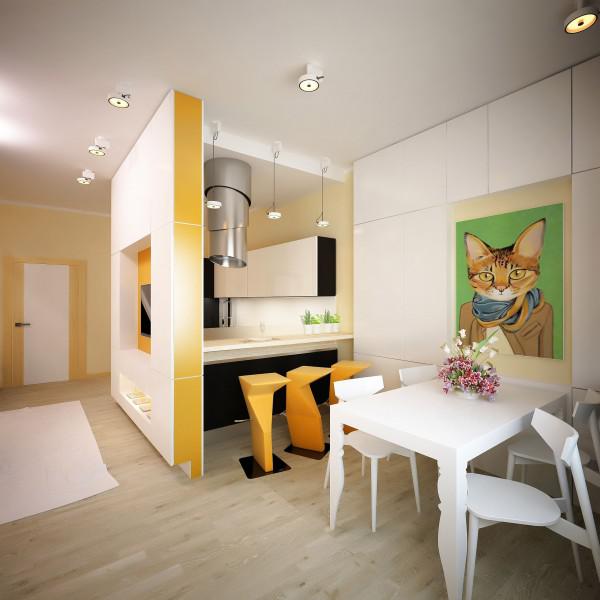
Mini kitchen where everything is at hand
Smart kitchen - a new word in room design:
To achieve maximum comfort in the kitchen, you need to take into account every little detail in the environment. It is not necessary to have a large space for preparing food, the main thing is to put everything in its place and then you will be able to get maximum pleasure from the cooking process.
Buying a new kitchen is a super-important event that requires thorough preparation. After all, its service life can be 10-20 years and what it will be will, to some extent, even affect the image and quality of life of the family. In this material we will tell you how to choose the right one kitchen set, in the format of a step-by-step guide with a selection of photos for inspiration.
10 stages of choosing and designing a kitchen set
Stage 1: Determine needs and requirements
Before you start planning your headset, think about what exactly you need from it. For example, if you often organize home celebrations and parties, then you should provide a place to store cutlery and a minibar in the kitchen. Do you love baking? Note to yourself that in the future set there should be a place for all kinds of shapes, molds and bread maker.
Clue
It will be great if you make a list of the necessary equipment, large utensils and dishes, as well as features like shelves for cookbooks, bottle holder, module for storing dustpan and broom and more.
Stage 2. Looking for ideas, deciding on color and style
Do not neglect the stage of searching for ideas, because it has a lot of practical significance— the more carefully you think about the details of your future headset, the less chance you will have of making mistakes and missing opportunities. Just look at pictures on the Internet (for example, on our website :)) and take note of successful solutions for:
- Module configurations;
- The location of the “work triangle”: stove/oven, sink and refrigerator;
- Location of household appliances – built-in and stationary, small and large;
- Materials and design of facades (shapes, styles, combinations of colors and textures);
- Materials and design of countertops and splashbacks;
- Fittings design;
- Furniture lighting;
- The location of the dining area relative to the cabinet itself.
Stage 3. Planning the design of the kitchen set
The design of a kitchen set depends mainly on its facades rather than on the frame, which is practically invisible. What should they be? Here are a few key tips by choosing their color:
- If the kitchen is small, rely on light colors (white is best) and possibly a glossy finish. Then the kitchen facades will reflect light, and the set will seem much less bulky.
White kitchen set in a small kitchen in a one-room Khrushchev building
- Also, the color of the facades can be matched to the tone of the walls - then the set will seem to “dissolve” in them.
- If your kitchen windows face south or southwest, then you can choose almost any color for the facades, and cool shades will be especially good - blue, indigo, turquoise. But if there is not enough light, then facades of warm colors - beige, yellow, red, pink, lilac and others - will help replace the sun.
- Do you want to spend as little time as possible cleaning the kitchen? Then beware dark colors(including in the choice of apron and tabletop), and especially in combination with gloss. There is nothing more tedious than wiping off fingerprints, tiny crumbs and water droplets from dark surfaces.
Now let's talk about kitchen furniture styles. Conventionally, kitchen sets can be divided into classic and modern.
- Classic sets are, of course, suitable for traditional interiors, ranging from “palace” to “village” ( Provence , country etc.). Their main feature is paneled facades made of wood (or imitation wood). Otherwise, they can be very different - decorated with cornices, carvings, patina, glass inserts, stained glass, etc.
A set with panels, decor and cornice in the Art Deco style in a kitchen in Khrushchev
When choosing classic facades, remember that too elegant facades risk overloading the interior and complicating cleaning. For small kitchens, sets with decorative elements are completely contraindicated; panels and glass inserts will be quite sufficient.
- Modern headsets, as a rule, are solid and often even without handles (with a push mechanism). They can compensate for their laconicism with color or an unusual texture, for example, a glossy, matte, satin surface, exotic wood trim, photo printing, etc. Due to their smoothness, they are easier to clean and “split” the space less, which is good for small kitchens.

Stage 4. Room measurements
Before designing a set, you need to measure and mark on the plan:
- Length and width of the room;
- The height of the walls from floor to ceiling;
- Distance between walls;
- Distance from corners to door;
- Doors and windows, as well as the distance from their edges to the floor, ceiling, corners. Don’t forget to measure the amount of space needed to open windows and doors;
- Dimensions of all protrusions;
- Distance from the wall and from the floor to the exhaust vent;
- Dimensions and location of pipes, ventilation shafts, radiator, geyser, if it exists;
- Sockets and switches. If you are at the renovation stage, then indicate on the plan the location of the sockets at the moment, as well as their desired location and number in the future kitchen;
- If you already have household appliances, then you need to measure them too.
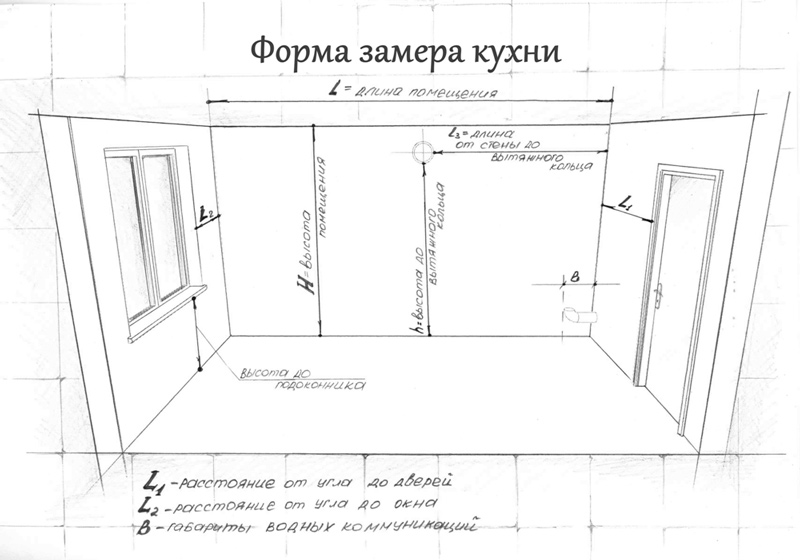
It is extremely important to measure all parameters correctly. An error of even 0.5 cm can cause you a lot of problems at the assembly stage
Clue
Before going to the store, measure all the parameters yourself. However, we recommend that you do not refuse the service of a full-time surveyor, which the seller will offer you after drawing up the project. After these “control” measurements, the project is once again clarified, approved, and only then they begin to manufacture your future kitchen.
Stage 5. Independent kitchen design (preliminary), layout of modules, placement of equipment
Now we have come to the most important step - the preliminary design of the set, which you will focus on when creating a final version of the project together with the designer of the furniture showroom.
- Designing a kitchen set is reminiscent of assembling a children's construction set, and the parts of this construction set are modules.
So, take graph paper or a piece of squared paper, or best of all, use a simple online planner like Planner5D or SketchUP Pro, draw your kitchen indicating all its features and, finally, assemble “brick by brick” the project of the future set, following these simple tips:
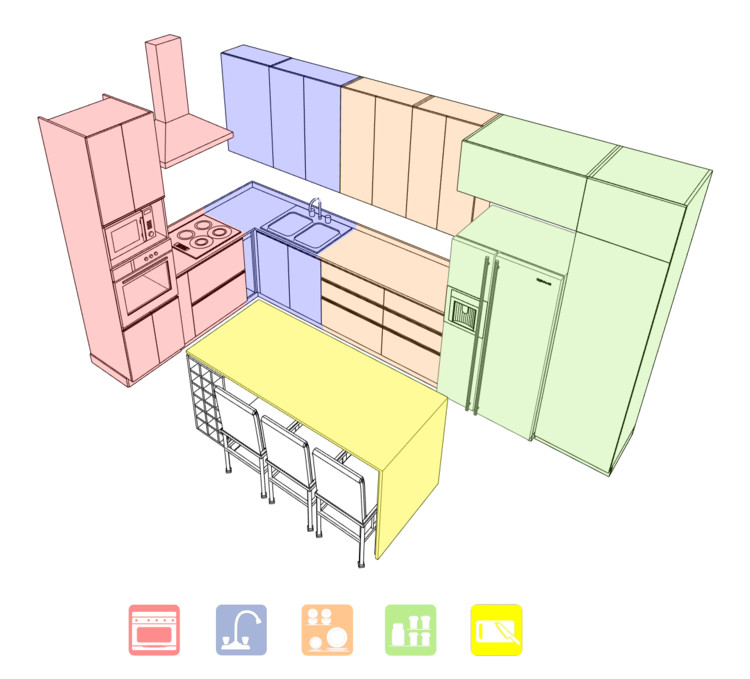
- The main principle that must be adhered to when arranging the set and arranging equipment: the three vertices of the “working triangle” - the food preparation area, the food storage area and the sink - should be in reasonable proximity to each other and form a conventional triangle.
This diagram shows how to properly plan a kitchen set to make it as convenient as possible.
There are 6 main types of kitchen layouts:
- Linear is the least convenient layout, since all operating points are placed in a row, and not according to the triangle principle. But this option is the most compact and suitable for very small kitchens.
- Double row - suitable for narrow and elongated kitchens. The passage between rows of furniture must be at least 1 meter.
![]()
- L-shaped (corner)- the most versatile type of layout, as it is compact, but at the same time comfortable and roomy due to the use of two walls and a corner.
Hints
- The short part of the headset must be at least 1 meter in length. In such a module just fits the washing machine .
- If you want to save space on the side corner kitchen can be made narrow. A narrow washing machine or storage boxes can be built into such a module. vegetable storage/utensils.
- U-shaped is the most convenient layout, but it “eats up” a lot of space and greatly clutters it up. In small kitchens, a U-shaped set is possible provided that a window sill is built in. An important condition is that the passage between the sides of the kitchen must be at least 1 meter, but no more than 180 cm, otherwise it will become inconvenient.
- Island is another super-convenient type of layout, which involves the presence of a remote module, and therefore requires a large room area - from 18 m2. The simplest tables are equipped only with a bar counter and shelves, the most advanced ones are equipped with a sink, stove, minibar, and oven. The island should follow the shape of the kitchen, and the passages around it should be at least 1 meter.
- Peninsular - a kitchen with a module, the end of which rests against the wall or furniture, making the layout more compact.
Read more about the types of kitchen layouts in specialized articles on our website:
Also see our other materials:
- You should start planning your kitchen from the dishwashing area, since the sink is usually a stationary point. Mark it in your plan. Above the sink, of course, there will be a place to store dishes and utensils, and under it it is convenient to hide a trash can and household products. On the right or left, sinks can be built in if necessary dishwasher .
Clue
If you are right-handed, then the dishwasher should be placed on the left, since with your left hand you will hold the plate, and with your right hand you will clean the dishes from leftovers, and then put them into the machine with your left hand. For left-handers, accordingly, placement on the right is recommended.
- Then you can determine the location of the hob/stove. As a rule, it is located near the sink, vent and gas pipe, if there is one. Between the sink and the stove it is advisable to place a food preparation area and, consequently, a storage area for utensils and groceries.
Clue
The distance between the sink and the stove should be at least 60 cm and no more than 180 cm, otherwise the kitchen will not be comfortable. Especially if you plan to place a cutting area in this gap.
- Ideally, on the other side of the sink you should place a storage area for food supplies and a refrigerator. The minimum distance from the sink to the refrigerator should be at least 40 cm.
- Then think about the location of the oven, microwave, dishwasher and washing machine. Keep in mind that the oven can be placed at eye level and separate from the hob, for example next to the refrigerator.
Clue
If your kitchen is small, you should use smaller appliances. For example, a dishwasher 45 cm wide, a hob with 2-3 burners, a washing machine 45 cm deep, a narrow refrigerator 55 cm wide. Multifunctional appliances such as an oven-microwave will also help save space. By the way, all types of equipment that can be built into the headset are preferably built in.
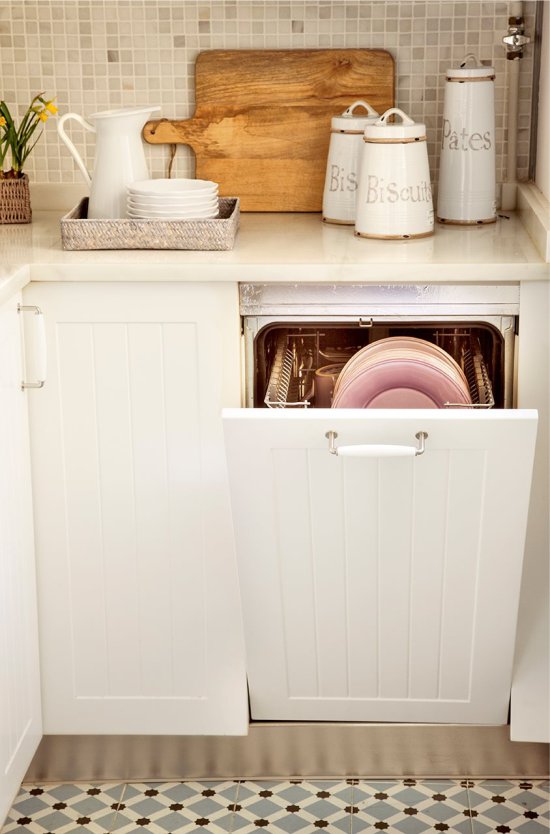
A narrow dishwasher will satisfy the needs of a family of 2-3 people
- You can increase the number of storage spaces by adding an additional third or even fourth tier, even if it reaches the ceiling. There you can hide not only rarely used utensils, but also an air duct.
- If there are small children in the house, or some corner of the cabinet protrudes awkwardly into the aisle, then it can be made rounded or beveled as in the photo below. This wish must be communicated to the designer.
- It is advisable that the height of the set correspond to the height of the most active cook in the house. If it is not high, then you should abandon the high apron, choose floor cabinets with a height of 70-85 cm and refrain from door closers that raise the doors upward. Although this is convenient for opening upper cabinets, you will need to use a stool to close them back. In addition, over time, such fittings become loose and stop holding the door.
- A cabinet or a whole block of cabinets (see photo below), into which you can build a microwave oven, oven, refrigerator and drawers for utensils/groceries, will help to increase your kitchen storage system.
- Remember that today many furniture manufacturers can do everything exactly as in fashionable design magazines, so get rid of old templates and feel free to ask consultants about the possibility of implementing non-standard solutions. For example, drawers can be built into the base, as in the photo below, and even a stand for pet food.
So, the idea of your future kitchen has become clearer. Show your plan to the designer in the store so that he can draw up a project in a special program taking into account your wishes, perhaps adjusting something, adding or removing unnecessary things.
Stage 6. Selection of materials for facades, countertops, apron
Comparison and selection of materials is a separate and important topic that requires detailed consideration. We recommend that you study it in more detail, but for now we suggest that you familiarize yourself with a brief summary of the materials of the facades, as well as the countertops and apron.
Facades
By “kitchen materials” we most often mean facade materials, since the kitchen frame is usually made of laminated chipboard (LDSP). This is reasonable, because the frame is practically invisible.
Front panel materials come in a variety of varieties, most often:
- Laminated/veneered chipboard;
- MDF laminated/veneered/varnished or other types of finishing;
- Solid wood of any kind (today completely wooden facades are a rarity, usually under “ wooden kitchen» means veneered facades);
- Glass (most often in the form of inserts or overlay panels);
- Metal (finished).
You should choose the material of the facades based on your planned design of the set, budget, practicality and wear resistance.
The most economical, but not reliable option is chipboard facades. The most common and average-priced facade material is MDF. It is practical and reliable. Veneered or wooden doors are the most beautiful and expensive, but not the most practical in everyday life.
Tabletop
The tabletop should be as wear-resistant as possible and, ideally, seamless. Countertop materials are as follows:
- laminated chipboard;
- Chipboard with a top layer of wood;
- Solid wood;
- Porcelain tiles and lithoceramics;
- Fake diamond;
- Natural stone - marble, basalt, granite.
If the company manufacturing your kitchen does not have a suitable countertop, order it separately from another company.
Apron
Apron materials can be the following:
- Ceramic tile;
- laminated chipboard;
- Mosaic from different materials;
- Mirror coating.
- Glass (skinned or triplex);
- Plastic;
- Metal panels;
- Artificial/natural stone;
- Wood (in combination with protective glass, For example).

Stage 7. Selection of internal filling, fittings and accessories
The convenience and spaciousness of the kitchen depends on the contents of the kitchen set. Here are some useful tips:
- For easy access to contents, it is recommended to use drawers instead of cabinets with shelves. So the necessary things will always be visible and easily accessible. The largest drawers are located at the bottom of the kitchen and are intended for storing large and heavy utensils/supplies.

- Kitchen facades can be not only hinged, but also sliding on guide profiles, with “curtains” made of slats like blinds, as well as lifting ones on special closers. The last option is the most unreliable and, moreover, not universal, because only tall people can close the lifting doors.
- Handles are not an obligatory part of facades, because they can be equipped with a push mechanism and can be opened only with a light touch.
- In order for the corners of the kitchen to be used to the maximum, it is recommended to equip them with retractable systems - baskets (for example, for garbage), shelves, shelves, and rotating carousels.
- In order to always keep your drawers in order, it is worth equipping them with special dividers. This way you can conveniently organize storage with compartments for lids, pots, molds and more.
- Stainless steel trays and dividers are best suited for storing cutlery.
Stage 8. Purchase of equipment and plumbing
At the stage of planning the headset, you have already thought about what household appliances and plumbing fixtures you need and approximately where they will be located. Now it's time to think about how to buy this equipment:
- Complete with a set, that is, through a furniture showroom— this method is good because it allows you not to worry about size compatibility, delivery and quality of installation of equipment/plumbing. In addition, companies often give a discount for a combined purchase. Unfortunately, the choice of models will be limited.
- Separately - equipment is purchased before or after ordering a kitchen from another store. When purchasing appliances before ordering a kitchen, the furniture will be designed to fit its dimensions. When purchasing equipment after ordering, you will have to buy it yourself at specified by the project sizes and delivered home at the time of assembly.
Stage 9. Selecting a furniture showroom
Now you can proceed to the decisive stage. Be prepared for the fact that finding the kitchen of your dreams will not be easy and the search will not be limited to one day, especially since the market is now very large.
- Don’t be lazy and ask your friends or on the Internet real reviews about furniture companies, specifying production times, build quality and prices.
- When communicating with design designers (this should be done not with one company, but with several), do not hesitate to ask them for all the details and ask them to work out several options for the layout of modules.
- Visit manufacturers' websites and compare prices, materials offered, and assembly options. Manufacturers often organize promotions, offering, for example, free assembly or measuring services, holiday discounts, etc.
- If you really like the kitchen, but its price does not fit into your budget, do not hesitate to ask for a discount. In order not to lose a client, companies often meet and provide a discount of 5-10%, which is always useful.
Stage 10. Kitchen assembly
Finally, the set and equipment have been chosen, all that remains is to assemble everything into a single whole.
- Do not skimp on assembly and do not assemble the headset yourself if you are not 100% confident in your skill. The assembler service costs about 10% of the cost of the headset, but it will save precious nerves and time.
- It is also better to entrust the installation of plumbing and installation of household appliances to a specialist.
- Be patient. Assembling a kitchen set takes about 6-8, and sometimes more, hours. After everything is done, carefully check how all the drawers and doors open, whether the appliances work, whether the seams and joints of the modules are neat, and whether all surfaces are free of scratches and damage.
- If you have any complaints, you must report this immediately to the collector. Then the company will conduct an examination, and as a result, most likely, they will make a discount or correct errors at their own expense. (Rate the material! Already voted: 39 average rating: 4,62 out of 5)