Easter is the brightest, quietest and most comfortable holiday. There are no noisy, incendiary parties on Easter; it should be spent at home, with your family, next to your loved ones. And in order to create the mood of a bright holiday and please loved ones, especially children, on Easter it is customary to prepare special Easter dishes and paint eggs. Decorating Easter eggs with your own hands is a great way to have fun. the site offers you original fresh bright ideas DIY Easter egg decorations. Let your family have a beautiful holiday!
Colors are the first thing that comes to mind when we want to decorate Easter eggs. Not everyone has artistic talent, but with a little tricks anyone can achieve great results. For example, if you add a little vegetable oil to a regular paint solution, the paint will lie unevenly, with intricate marble patterns. You can repeat this trick several times from light to dark paint and get a very interesting texture.
Decorating Easter eggs with your own hands from different shades of the same color is always beautiful and elegant. Dilute one paint in different containers of different saturations and draw shapes on the eggs: stripes, polka dots, flowers. A few eggs can be painted entirely and some accents of a different color can be added, such as a bright butterfly or flower.

If you don’t want to bother with dyes, you can get by with just one marker or felt-tip pen. With a steady hand, draw simple shapes on the white, thoroughly washed eggs: stars, drops, flowers. It will turn out discreet and stylish.

Minimalism doesn't have to be strict. If you use a bright red color, then even the simplest pattern will be bright and cheerful: with white dots - fly agarics, with black dots - ladybugs.

The following methods of decorating Easter eggs are suitable for needlewomen who have a supply of various materials for needlework at home: fabric, ribbons, felt, quilling paper and other interesting things.
By cutting out ears from paper or felt, Easter eggs can be turned into cute bunnies.

And in order for the eggs to turn into chickens, in addition to felt or paper, you will need thick colored threads or braid, which you can simply wrap around the eggs, smeared with glue.

You can make decorative eggs or cute handbag covers for real eggs from colored felt or thick fabric. This would be a great activity for kids and a cute gift for grandmas.

If time is short, a small piece of colored fabric will be enough to decorate eggs for Easter: you can cut out hearts, flowers or stars from it and stick it on brown, undyed eggs.

Quilling is a craft that turns strips of paper into masterpieces. Decorating the entire surface of an egg using the quilling technique is very difficult, but anyone can make a few simple curls or flowers.

The decoupage technique is usually used to decorate boxes and other wooden crafts, but it’s also suitable for Easter eggs. Decoupage eggs are a great way to make your Easter basket unique. You will need special napkins with a small pattern, which need to be fixed to the surface of the egg with water, and then covered with paste and dried.

Decorating Easter eggs with your own hands gives children an unforgettable experience and helps develop their creativity. In addition, self-decorated eggs are a versatile, inexpensive gift.
Hello, friends! The bright holiday of Easter is approaching.
In this regard, I suggest you stock up on ideas for decorating Easter eggs in unusual ways. Involve children in this process, I’m sure they will be very interested.
I offer you 13 great ideas.
Decorating Easter eggs using decoupage technique
 Decoupage works always fascinate with their unusual beauty. You can decorate eggs using this technique.
We will need:
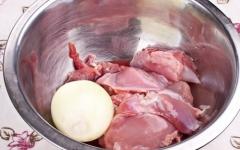
Boiled eggs;
. beaten egg white to replace glue;
. beautiful napkins, the designs of which you will use;
. scissors;
. brush.
This video will help you learn how to decorate eggs using the decoupage technique.
Making such an egg is very simple.
We will need:
Boiled eggs;
. vinegar;
. bright food colors;
. paper napkins.
Place the egg on a napkin, wrap it in it and moisten it with vinegar. Then unfold and apply droplets of different paints to the egg. Don't overdo it, the colors shouldn't mix. Carefully wrap the egg in a napkin again and place it in a dry and warm place. After a few hours, unfold the napkin and get a wonderfully colorful egg.
Decorating Easter eggs using the permanent technique
 In my opinion, this is the simplest, but very interesting way decorating Easter eggs, which should really appeal to children.
We just need white eggs and a permanent marker, or better yet, several different colors so that we can color the egg in all the shades of the rainbow.
Give free rein to your imagination, draw whatever you like.
Decorating Easter eggs with lace

Wrap the egg in lace fabric, collect the excess and tie it so that the lace fits tightly to the egg.
Dip the egg in food coloring for 10-12 minutes, then remove the egg and free it from the lace bag.
Ready! The result is a wonderful, delicate lace pattern!
Decorating Easter eggs with glitter

Color the eggs with food coloring, coat them with half-beaten egg yolk and sprinkle with matching glitter.
You can coat the eggs unevenly, with spots or some shapes.
Imagine with your child, perhaps he will want you to help him make some brilliant inscription on the testicle.
Decorating Easter eggs in color blocking style

You're probably familiar with color blocking, so why not use it to decorate eggs?
We need:
White boiled eggs;
. vinegar;
. bright food colors;
You need to color the eggs as follows. Dip 1/2 or 1/3 of the egg into the dye, wait for it to color, dry it and start coloring the untouched part. You can use multiple colors and color the eggs vertically, horizontally and even diagonally. In order not to hold the egg while it is being colored, you can use baby food jars; they allow you to color the egg by 1/4 or 1/3, depending on the diameter of the neck of the jar.
Decorating Easter eggs with silk
 Want to get unusual eggs? Then dye them using silk.
Prepare scraps of silk with different patterns.
Wrap the finished, slightly moist eggs in scraps of silk and tie them with thread so that the fabric does not move. Afterwards, put them in a saucepan with warm water with vinegar added. Cook the eggs over low heat for 30 minutes. Then cool and remove from the fabric.
Decorating Easter eggs with cereals


One of the most troublesome, but very beautiful and original ways to decorate eggs.
We will need various cereals, flour paste, eggs and a brush.

You can easily make your own glue. Stir three tablespoons of flour in one glass of water and place the resulting mixture on the fire. Stirring continuously, bring the mixture to a boil. After cooling, the glue is ready.
Coat the egg with paste and begin decorating with cereals.
You can also use star pasta for decoration, which can be dyed any color using dyes. The result obtained depends only on your imagination.
Decorating Easter eggs with watercolors and pencils

This method is ideal for creativity with children and allows you to make each egg extraordinary.
Paint boiled eggs several times with watercolor paint and dry.
Then take colored pencils and draw whatever you want on the eggs. To fix the resulting beauty, you need to cover the eggs with wax.
And in this video you can see how to make real pysanka eggs
Decorating Easter eggs with stripes

Making a striped egg is quite simple.
Cover the eggs with electrical tape and start coloring.
Use dyes from light to brighter and more saturated.
After each painting, remove several strips of electrical tape.
Decorating Easter eggs with gold

To get such fabulous eggs, reminiscent of the fairy tale “The Ringed Hen,” you need to cover them with gold foil.
Wrap dry eggs, pre-coated with glue, in foil and wait until the glue dries. Then remove the excess with a soft cloth or sponge and repeat the procedure in those places where there is no foil.
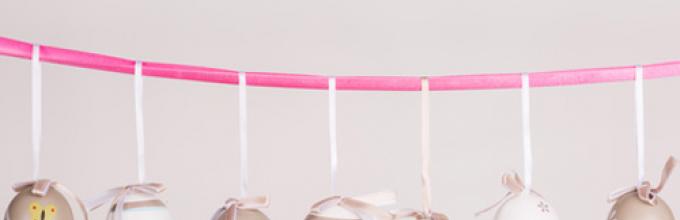
You should get even golden eggs. For beauty, you can tie them with colored ribbons.
Decoration of Easter eggs - drapanki

In order to make original drapanki eggs, you need to boil them in onion peels and cool.
Afterwards, draw a design on the egg with a sharp pencil.
Using a utility knife or needle, scratch the egg exactly along the lines of the design, thereby removing the paint and leaving white marks.
Decorating Easter eggs using quilling technique
 To make such miracle eggs we will need:
Regular eggs;
. special multi-colored strips for quilling, 3 mm wide;
. glue stick;
. a toothpick forked at the tip;
. tweezers.
We twist the strips, give them the desired shape and hold them with tweezers and glue them together. You can see how to do this in this article.
Usually, PVA and instant glue are used for quilling, but since we will be decorating eggs that we will eat later, I advise you to use regular glue with a pencil. It is quite viscous, and it seems to me that it will not have time to be absorbed into the shell before it dries.
I suggest watching the video - " Easter Egg using quilling technique"
Happy holiday to you! Love, health, peace and prosperity to your families!
Http://roditelyam-o-detyah.ru/ukrashenie-pashalnih-yaits/
Easter is approaching, and it’s time to think about how to beautifully decorate the Easter table and what gifts to prepare for loved ones and friends. And a mandatory attribute of this holiday is colored eggs. Our review includes creative ways to make this Easter accessory unusual.
1. Space dust

First of all, you need to paint the eggs with dark purple or blue paint and let them dry well. Next, use a brush to spray glitter or white paint onto the painted eggs.
2. Intricate patterns

Wrap the eggs in old ties and boil them in water with vinegar.
3. Black and white decor

Use a regular black marker to paint your Easter eggs in an original way.
4. Dragon eggs

You should cut out many identical “scales” from thick metallic paper and glue them to the shells of boiled eggs.
5. Play of colors

To get such an interesting color transition, boiled eggs should be placed in a container with dye, into which water should be gradually added.
6. Cartoon decor

Use food coloring to color the eggs so that one half is yellow and the other half is blue. When the paint is dry, start decorating. To decorate the eggs you will need eyes, thick black thread and a regular black marker.
7. Mosaic

Use the shards eggshells to create a unique Easter decoration.
8. Gold leaf

Using food coloring, color the eggs in your desired colors and let them dry thoroughly. Glue thin gold foil onto the painted eggs. Using a soft nail file to create a beautiful distressed effect.
9. Case

Skilled needlewomen can try knitting a lace cover for Easter eggs.
10. Sweet eggs

The eggs should be coated with a thin layer of PVA glue, and then thoroughly rolled in confectionery sprinkles.
11. Pencil drawings

First, you need to paint boiled eggs with watercolors or food coloring and dry the paints well. Next, using a soft pencil, you should decorate the eggs with simple drawings or patterns.
12. Bullfinches

Using paints you can turn Easter eggs into adorable bullfinches.
13. Application

Decorate your eggs with wonderful spring appliqués that can be made using colored corrugated paper and PVA glue.
14. Simple drawings

You can decorate eggs not only with paints or food colorings, but also with felt-tip pens.
15. Eggs in moss

To create such a composition, it is better to use blown eggs. Using tweezers, stick the moss onto the shell and decorate the composition with coarse rope.
16. Glitter

Another the simplest way egg decorations Blown egg shells should be coated with a thin layer of glue and rolled in glitter.
17. Thread technique

For such an interesting decoration, it is better to use polystyrene foam eggs, since a regular shell will be too fragile for this. A needle is stuck into the “top” of the egg, and a thread is wound around it. To prevent the thread from slipping, the surface of the egg should be coated with textile glue.
18. Minimalism

Stylish decor that anyone can do.
click:
Decorating Easter eggs is an ancient tradition, without which not a single celebration of the Resurrection of the Lord by Christian believers is complete. There are many options for decoration, ranging from traditional dyeing, including natural dyes, to original decor such as decoupage from napkins or beads. This tradition is especially loved by children, who with great pleasure engage in such homework under the guidance of adults, creating the most original krashanki and pysanky with their own hands. This article will discuss exactly how to decorate eggs for Easter at home and how to decorate them beautifully. It contains quite simple and incredibly beautiful master classes with photos and videos on decorating Easter eggs with step-by-step instructions.
How to decorate eggs for Easter 2017 with your own hands using the decoupage technique from napkins, step-by-step master class with photos
Many people are familiar with the decoupage technique from childhood. But not all of us use decoupage techniques, for example, from napkins, in order to decorate eggs for Easter with our own hands. But in vain! If you follow the instructions correctly, in just a few minutes you can get very elegant and original Easter eggs, not inferior in beauty to the painted versions. Learn how to decorate eggs for Easter with your own hands using decoupage from napkins from the following master class with photos.

Necessary materials to decorate eggs for Easter using napkin decoupage
- napkins with drawings
- PVA glue
- flat brush
- scissors
Instructions on how to decorate eggs for Easter step by step with your own hands using the decoupage technique

How to decorate eggs for Easter 2017 with your own hands for children - a quick option with step-by-step photos
Young children love decorating eggs for Easter with their own hands together with their parents, who, as a rule, choose quick and easy ones for this purpose. simple options decor. For example, like our next master class with photos on decorating eggs using wax pencils. Read on to learn how to decorate eggs for Easter with your own hands (a quick option for children with photos).

Necessary materials for a quick option on how to decorate eggs for Easter with your own hands
- wax crayons
Instructions for a quick option on how to decorate eggs for Easter with your own hands for children

How to beautifully and originally decorate eggs for Easter with lace, master class with photos step by step
If you are looking for a way to beautifully, originally, and most importantly, simply decorate eggs for Easter, then our next master class with lace will be perfect for you. With its help, very delicate and sophisticated dyes are obtained that delight the eye with their simple beauty. Learn more about how to beautifully and originally decorate eggs for Easter with lace in the master class with photos below.

Necessary materials to decorate eggs for Easter with lace in an original and beautiful way
- egg dyes
- pieces of different lace
- threads
- scissors
- spoon
Step-by-step instructions on how to beautifully and originally decorate eggs with lace for Easter

How you can beautifully decorate eggs for Easter 2017 with your own hands at home, step-by-step photos
In fact, you can beautifully decorate eggs for Easter with your own hands at home using almost any available material. Eggs decorated with various grains, colored foil, feathers, and beads are very impressive. You can also beautifully decorate eggs for Easter with your own hands at home and using stickers. For example, the following master class with photos will show how you can create very original Easter eggs using self-adhesive paper.

Necessary materials to beautifully decorate eggs for Easter with your own hands
- self-adhesive paper
- black marker
- scissors
- egg dyes
Instructions on how and how to decorate eggs beautifully at home for Easter

How to decorate eggs for Easter with your own hands at home using natural cereals, video
Do-it-yourself Easter eggs turn out beautiful and unusual if you decorate them at home using natural cereals. For this purpose, you can use both an assortment of regular cereals (buckwheat, rice, oatmeal), as well as seeds and grains. For example, multi-colored grains included in parrot food are excellent for this purpose. The process itself is very simple and fun, so it’s ideal for decorating with small children. By the way, working with cereals has a very positive effect on fine motor skills, which is especially important for children. Learn more about how to decorate eggs for Easter with your own hands at home using natural cereals in the video below.
Now you know how to decorate eggs for Easter with your own hands beautifully, quickly and originally at home using available materials. We hope that the prepared master classes with step by step photos and videos will inspire you to get creative with Easter, including with children. And remember exactly what to decorate with and what technique you choose to decorate eggs (decoupage from napkins, mosaic from natural grains, beads), the main thing is to put a piece of your soul into this process. And then such Easter krashanki and pysanky will bring a lot of benefits to you and your guests!
(78
people already rated)
Easter! There is something magical about this holiday. This holiday is always associated with spring, flowers, birds and warmth.
There are a lot of Easter decor ideas.
Decorating eggs for Easter 2020- this is a separate topic. Now there are many ways to make this holiday bright and unforgettable, since decorating eggs is a very exciting process in which not only adults, but also children can be involved.
The Easter egg is the main symbol of the holiday, so their decor should be original and memorable.
Before I start sharing decor ideas with you, I'll tell you one small detail. There are two options for holiday eggs - boiled eggs that you plan to eat, and the second option is souvenir eggs that can be kept as a keepsake or given as a gift. So, if you plan to make souvenir eggs, then before decorating them you need to blow them out so that in the future they do not deteriorate or become rotten. It's very easy to do. Make two small holes in the egg at the bottom and top and simply blow the contents into a bowl. 
Now you can start decorating.
1. DIY Easter eggs using decoupage technique.
Let’s immediately say that there are several types of Easter decoupage eggs. The most common is decoupage using napkins.
Decoupage Easter eggs with napkins.
This is the easiest way to get the most original eggs for Easter. The most important thing is to prepare in advance, buy several types of beautiful napkins with patterns of flowers, birds or other patterns.
If you are making souvenir eggs, then it is better to use PVA glue for decoupage. Coat the yaouo with glue, then glue the cut out patterns or the entire piece of napkin onto the egg. Cover the top of the pattern again with a layer of glue.
If you plan to eat eggs, then it is better to use egg white instead of glue. The principle of operation is the same as with glue.

And here is a photo of what finished Easter eggs can look like using the decoupage technique.


Vintage eggs using decoupage technique.
Also, original vintage eggs using the decoupage technique can be made from old newspapers, sheet music, old letters, etc. Such clippings can be found on the Internet and printed. It is better to print on thin paper. Then cut the sheets into small strips and glue the paper in the same way as described above.


Using the principle of decoupage, you can glue anything onto eggs. So, for example, it could be feathers or living plants.


2.Painting eggs by hand.
If you are good at drawing, then you will be quite capable of decorating eggs with your own hands using paints, markers or felt-tip pens. These can be simple drawings, such as flowers, emoticons, stripes, etc.

original do-it-yourself Easter eggs emoticons

original eggs for Easter with your own hands, imitation embroidery


If your artistic skills are still a little better, then you can create real works of Easter art.


3. Coloring eggs using food coloring.
Every year, every housewife buys a pack of special dyes for Easter eggs. These are not curiosities and such dyes are sold in every store. But many are simply tired of the monotonous colorful eggs and want something new. There is a solution to this problem.
Very simply, using regular food coloring for eggs you can make beautiful original eggs. It's very easy to do. Dip the eggs not completely, but only partly, into the dye. You can dye eggs one or more colors by dipping the eggs into the dye, but at different angles. The result will exceed your expectations.


How to make eggs in the form of minions.
Eggs in the form of minions are very popular now. It's very easy to make them. Dip half the egg in yellow dye and color the other half in blue dye. Then, using a marker, draw or glue the finished eyes, and add other necessary details.

4.Painting eggs using available materials.
If you are bored with monotonous colored eggs, but at the same time you have little time to “reinvent the wheel”. We offer you a simple solution. Probably everyone has tape, elastic bands, scraps of lace, etc. at home. You can also make something original out of these simple things. Just wrap the egg with rubber bands or stick it with strips of tape in any order. And dip it in the dye. Let it dry a little. Remove everything unnecessary and voila...


5.Do it yourself Easter eggs with polka dots.
A very original idea - polka dot eggs. What's even better is that they couldn't be easier to make. There are several ways.
The easiest way is to simply draw polka dots with a marker or paint.

The second, and no less simple, way is to stick confetti or round stickers.

Another way to use glitter: draw a circle on an egg with glue and dip it in glitter.

Another way to make polka dot eggs is a little more complicated and time consuming. Place stickers in the form of circles on a clean white egg (you can use special stickers or cut them out, for example, from tape), then dip the egg in dye, let dry and remove the stickers.

5. Decorate Easter eggs using glitter.
This option for decorating eggs is more suitable for souvenir eggs, since if you want to eat such eggs, then you risk eating a lot of small sparkles.
If you like glitter, you can cover the egg with glue and completely roll the eggs in glitter.

You can also partially coat the eggs in glitter or apply various designs. Just draw any pattern with glue and roll the egg in glitter and let dry.


6.Easter eggs made of thread.
Another simple and original way to decorate Easter eggs is to simply wrap them with thread. Cover the egg with PVA glue and wrap it tightly with colored or jute thread.

DIY Easter eggs made from thread

7.Foil Easter eggs.
Wrap the entire egg with a piece of foil and smooth it out. You can add any drawings.
8. Grandmother's way.
Probably everyone knows this method of painting eggs using plant leaves and stockings. All you need to do is attach the sheet tightly to the egg, and then wrap it tightly with a stocking and secure it. Then dip the egg in the dye, let it dry a little and remove all excess.