The simplest and most popular way to give a door an attractive appearance is to upholster it with some material. This can be done both indoors and outdoors, you just have to use different materials and different technologies. But in any case, the process is called “door trim”. All the subtleties and nuances are discussed below.
What can you use to beat doors?
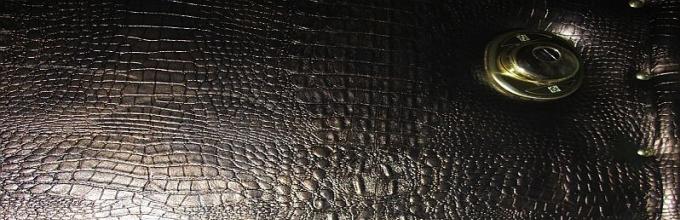
There are two types of door upholstery - soft and hard. The soft one is made from two materials - dermantine (leatherette) and vinyl leatherette. Dermantin is a woven cotton base coated with a film of nitrocellulose. This material was popular in the 40-60s of the last century, as it was practical and inexpensive. A little later, vinyl leather appeared.
A little about vinyl leather and leatherette
This material is made on different substrates - woven and non-woven, stretchy and not. Accordingly, artificial leather has different properties. A layer of polyvinyl chloride (PVC or PVC) is applied to the base. It is more durable and chemically neutral. It has only one significant drawback - it reacts poorly to ultraviolet rays - it loses elasticity, changes color, and can crack. Therefore, upholstery of doors facing directly onto the street with vinyl leather is undesirable. There is, however, a material with increased resistance to UV rays, but this is a special material and you need to pay attention to this when purchasing.
Now about a little confusion in terminology. Dermantin in its pure form, as it was in the last century, has not been produced for quite some time. Instead, there are different types of vinyl faux leather. There are also materials coated with other polymers, but there are not many of them. So, from old memory, they are all called dermantine or leatherette (although it is correct, by the way, to say “dermatine” without the “n”). So when you see this name, you need to clarify what kind of material is meant, since the properties and prices differ significantly.
Despite the fact that the material is essentially the same, it has different characteristics and appearance. There are elastic types that stretch well, and there are hard ones that are difficult to stretch. In addition, modern artificial leather has many colors and shades and can have different surface structures:

So the choice of soft upholstery materials for doors is extensive. Apparently, this is the determining factor in the popularity of this type of door upholstery.
Hard door trim
There are more rigid upholstery materials for doors, although they are used less often:
- MDF panels with thickness from 8 mm to 18 mm;
- natural wood - fragments, solid wood;
- veneer;
- laminate;
- plastic;
- postforming.
From this entire list, doors are most often finished with MDF overlays/panels. This type of upholstery is especially popular for decorating metal doors, including homemade ones. The panels are made according to the dimensions of a specific door leaf, after which they are installed with glue or foam into fixed starting strips. In this case, and makes sense.

From the catalog - options for MDF overlays, and all this in different colors...
The door trim is practically the same with other materials - laminate, plastic, postforming. Starting profiles are installed around the perimeter of the door, into which fragments of trim cut “to size” are inserted. Everything is simple, if you have basic skills in working with a drill, saw and hammer, you can do it yourself in a few hours.
Door upholstery with dermantine
The most popular way to cover a door is with artificial leather. This section allows, at the same time as improving the appearance, to increase the thermal and sound insulation performance. But this type of door trim also has its disadvantages - this is the most complex technological process, requiring at least a general understanding of the procedure.
Upholstery methods
We will talk about the technology of door upholstery with dermantine. You can attach it in two ways: with a roller around the perimeter of the door leaf and without it. Depending on this, the order of actions changes (more on this later).

Door upholstery with dermantine - with and without a roller

For banners, you can use the same material that was used to trim the doors. It is cut into strips 2.5-3 cm wide, attached to the top nails, and then pulled and fixed by the next nails to form a pattern. To secure the strip, you can wrap it around a nail that is not completely driven in, which is then driven in. But this option is suitable if decorative nails have large heads. If the caps are small, the strips are nailed.
The pattern can also be formed using a thin metal flexible cable, but it is more difficult to attach - it bends less easily.
How and with what to attach leatherette to the door leaf
If you need upholstery on a wooden door, there are usually no questions asked - they are secured with staples and then nailed along the contour with decorative nails. Only here there are nuances: the staples must have a wide back (at least 1 mm), and the nails must be wallpaper nails with a wide head. The fastener installation step is from 2.5 to 7 cm, as desired.

More questions arise when it is necessary to cover an iron door with dermantine. There is only one way out - to plant it on glue. “Moment” glue is usually used, but any other universal glue can be used, which can be used to glue both metal and leatherette. It is used to lubricate the strip from the inside (the strip that runs along the perimeter of the door and covers the junction of the leaf with the door frame). When attaching vinyl artificial leather, it is cut out with a margin of 15 cm, just for the hem on both sides to the wrong side.
Materials for heat and noise insulation
Foam rubber is most often used to insulate doors. It is inexpensive and, if desired, allows you to create a voluminous convex pattern. The most common case is two layers of foam rubber, 1 cm each. This option is not the best - foam rubber has almost no effect on the soundproofing properties of the door, and this is what is sometimes very important. In addition, after 3-4 years it loses its elasticity, begins to stick together, and you have to reupholster the door, although the appearance of the leatherette is still quite decent.
All this is true, but there are no worthy competitors for foam rubber yet. There are materials with certain properties that can be laid instead of one of the layers, and the second will still be foam rubber. For example, to improve sound insulation properties, you can use Isoton. It is used for heat, sound and insulation of cars. Sold in small sheets, an adhesive composition is applied to the back side, protected by plastic film. So there will be no problems with installation. The disadvantages are the price and the rather large weight of the material. To avoid problems, it is worth replacing the hinges with more powerful ones.

There are two other materials used in the automotive industry with similar properties. These are “Splen” and “Vibrofilter”. All of them are made on an adhesive base and can be used to improve the characteristics of the door.
How to beat a wooden door
It is more convenient to work on a removed door, but if this is a problem, you can beat it right on the spot. First you need to remove all the fittings from the door leaf - locks, latches, door peephole. If there is old upholstery, it is carefully removed. If part of the door requires repair, the damaged fragments are removed and replaced with wooden ones cut to size. The cracks can be covered with putty or foamed with polyurethane foam with a low expansion coefficient.

If there was a pattern on the upholstery, and you are generally satisfied with it, we drive regular nails into the places where the nails forming the pattern were driven. We do not hammer them in completely, the caps should stick out by 1-1.5 cm. With their help, we will then break through the foam rubber and upholstery in the right places (just press with your fingers, all layers will be pressed through). We will take out ordinary nails, install decorative ones in their place, and use tape to form a pattern. The procedure is simple.
With roller
To make the end of the door look no worse than the rest of the plane, we start with it. If you are not going to finish one of the sides, skip this step, just paint the end with paint to match the finish on one side or the other. If we are going to upholster the doors on both sides, we cut out a strip of material about 10 cm wide. Look at your door more precisely, since the thickness of the sheet varies. The strip should cover the end and extend on one and the other side by 3-4 cm. Lay the strip, fasten it along the edge with staples (faster and easier) or nails with a large flat head.

To form a roller, you also need a strip of material. Width - 10-15 cm depending on how wide you want the roller. Then there are two options:

The difference between these two methods is only in appearance: in the first case, the nails are nailed along the edge of the upholstery (pictured on the right), in the second - along the edge of the bolster (pictured on the left). They choose who they like best. For example, it seems to me that the first option (on the right) looks better - more neat. But this is just a personal opinion.

What is this roller for? In order to cover possible gaps between the canvas and the jamb. This way we avoid drafts and reduce heat loss. But you can make a roller only if the doors are upholstered on the opening side (the doors open into the apartment, so we upholster them from the inside). If, on the other hand, this trick doesn’t work, it won’t close. Then you have to do without a roller.
In this case, everything is simple: the canvas is folded evenly, fixed with nails or staples - whichever suits you best.

The door upholstery process in photo format
To reduce noise levels, the doors are covered with one layer of sound insulation and one layer of foam rubber. The option with preliminary production of the roller was chosen. First, we removed the old fittings and installed a new lock. The trim and handle were removed, but the internal parts remained in place. Let's start upholstering the doors.
We immediately form a roller - we place narrow foam rubber in a strip of dermantine and fasten it along the perimeter of the door. It is more convenient to do this with staples from a stapler.

The next step is to install sound insulation. It is adhesive-based, so there are no problems - we cut it to size, carefully removed the film and glued it on. When gluing, we try to squeeze out all the air; to do this, we tear off the film gradually, ironing the material from edge to edge.

Now we attach foam rubber 1 cm thick. In this option, the most convenient method is staples from a construction stapler. First we fasten it around the perimeter, then often along the surface of the door so that the foam fits tightly.

The foam rubber is cut out with a small margin, and after installation the excess is cut off.

We turn the top edge 2-3 cm, start fastening from the upper left corner. There we hammer in the first nail, then we straighten the material and nail the second one at the top right. Then, in increments of 3-4 cm, we nail the upholstery with finishing nails from one edge to the other.

We fasten from the hinge side, turning the edge inward. Straighten it evenly so that there are no creases at the top.

Afterwards the same operation is repeated from the side of the lock, then below. Actually, the door upholstery is almost finished, you just need to put the fittings in place.

Video lessons on the topic
Vinyl leather for door upholstery is sold both by the meter and in sets. In some sets, the method of fastening may be different: they have plastic profiles that are attached around the perimeter of the door leaf. These profiles have a fixation system similar to that used in suspended ceilings.
The following video shows the process using roll material.
How to insulate and upholster the front door. The second type of bead formation technique is that it is nailed last.
How to upholster metal doors
The front part of metal doors is rarely upholstered - it already has a quite attractive appearance. Most often the internal part suffers. That's what we'll talk about.
There is a frame on the inside of the iron door. In some models it is metal, in others it is wooden. Thermal insulation material is placed between the frame slats. This can be polystyrene foam or mineral wool slabs. They are attached to polyurethane foam, which has a very small coefficient of expansion (required!). From above everything is covered with a sheet of plywood or OSB. This is the standard option. If the slats are wooden, everything is fine, there are no problems - the doors will not freeze. But if the frame inside the door is metal, in good frosts everything will freeze through and through - through cold bridges, which are metal ribs. To prevent this from happening, a layer of “Isoton” or “Spleen” is laid again on top of the foam/mineral wool, and then plywood is placed on top of them.
The remaining processes when upholstering a metal door are very similar to those described above. The only difference is in the method of fixation: the upholstery is glued to a suitable high-quality glue. The excess is immediately cut off at the joint using a sharp wallpaper knife.
This is where the classic mistake was made - there is no layer that cuts off the cold bridges. Otherwise, everything is shown well.
In a new car, at first everything is like this, but with use, the colors of the upholstery material begin to lose their brightness, wear out and become covered with stains that can no longer be cleaned. This problem is especially acute for light-colored interiors, when after several years of operation, reupholstering the car interior with your own hands is simply necessary.
The issue, of course, can be resolved by contacting a service center where professionals will completely change the upholstery of the seats and interior, but many people can do the upholstery of a car with their own hands, so you will save a significant amount of money and be able to give the car elegance to your personal taste.
Step 1: choose the material
Everyone will agree that leather upholstery is the ideal solution for any vehicle, but not everyone can afford this pleasure, since it is not cheap.
However, today there are other upholstery materials that have earned popularity among car owners for their qualities:
- Carpet is the cheapest and most easily accessible of materials; a decorative pile covering is usually applied on top of its non-woven base. Its main advantage is the completely uncomplicated installation process and a huge selection of colors.
- Alcantara - has a base of fine-fiber threads; the material is made using chemical and textile industry technologies. Alcantara is a material with good strength and durability characteristics, it is distinguished by its softness, silky surface and dirt-resistant coating.
- Leatherette is a cheap and attractive material, which, unfortunately, has an impressive list of disadvantages. Its main disadvantages include an unpleasant odor that lingers in the cabin for a long time, increased elasticity characteristics, low resistance to mechanical influences, as well as the ability to absorb odors, sometimes quite unpleasant.
When purchasing material for future reupholstery of a car interior with your own hands, be sure to look at the quality of the product they want to sell you; you should check the uniformity of the structures of any material. If you decide to go with Alcantara, remember that the direction of the fibers can be decisive when cutting, otherwise it will turn out that all the parts on one seat will differ in shades.
Step 2: prepare the tools

Since the process of upholstering a car interior with any material, be it leatherette, carpet, velor or leather, is carried out according to a certain algorithm, it requires tools, sometimes you even need to buy them specially. So, you will need: a sewing machine (you need it if you plan to replace the seat trim), soundproofing materials (optional), a set of keys. And also a couple of tubes of glue, a hair dryer, a set of screwdrivers, and scissors for working with linoleum.
Step 3: Let's get started
It must be remembered that depending on the car model, the sequence for replacing interior upholstery may vary slightly. However, in general terms it is the same for everyone:
- First, all fasteners and all accessories, such as visors, handles and decorative elements, are removed
- The electrical wiring in the car is disconnected, the connectors are removed, the decorative elements are unfastened and the previous upholstery is removed.
- When dismantling is completed, the surfaces are cleaned of all contaminants.
- All parts made of metal and plastic are degreased
- The cutting of the future upholstery is carried out, for which the previous parts are applied to a sheet of cardboard, then it should be cut out. It is advisable to transfer finished cardboard patterns to the prepared material only when you check whether everything was done correctly.
- When the parts of the new upholstery are ready, they should begin to be installed on the surface, having first thoroughly coated them with a layer of glue
- If necessary, you can use a hairdryer to smooth out any wrinkles. In addition to steaming, you can beat off the upholstery seams with little force, then everything will look even more neat and beautiful.
- And finally, all the fastening elements removed at the beginning of the work should be put back into place.
Do-it-yourself car interior trim: some useful tips for each part of the interior
First, let's watch the video:
Seats
If you are planning to completely replace the upholstery on the seats, and not purchase new covers, then first you need to cut the old upholstery at the seams, and you will use it to make a pattern. After the individual elements are ready, use a sewing machine to assemble them into a single product. Nowadays it is much easier to go and buy new covers; car stores have a huge selection of different options for this product.

Doors
Removing dirt is especially important when changing the upholstery on car doors yourself. When you start cutting, remember to leave about a centimeter allowance on all sides of the piece. Be careful when making the holes needed for the door handle and window crank. In places where the upholstery is adjacent to the door, be sure to apply a layer of glue.
Do-it-yourself car interior reupholstery: ceiling
To replace the ceiling lining, an important fact is the complete dismantling of all backlight lamps, plugs, handles and decorative parts of the racks. Only fulfilling this condition will allow you to change the ceiling trim as carefully as possible. By the way, if you have chosen leatherette for the ceiling, it is recommended to heat it up a little before starting installation, then it will be elastic, which means it can be fixed easily and simply.
Armrests
To reupholster the armrests, you first need to remove them, then make patterns using the previous parts, be sure to leave small reserves of material at the edges. After this, the product is glued over the entire area, the edges are carefully secured, and processed with a hair dryer.
And finally
In cases where there is a need or simply a desire, before the final installation of the new upholstery, foam rubber or special insulating material is placed under the parts.

As it becomes clear from all of the above, reupholstering the car interior with your own hands is a very real task. Of course, it requires investing a certain amount of money and several hours of time, but the result is worth it, because then you will be proud that you changed all the upholstery in your car with your own hands, without the help of professionals.
Actually, it all started with the fact that the stove tap broke - it began to leak, and all the antifreeze dripped right under the feet of the front passenger. Repairs were needed. What to do? The thoughts were: disassemble the interior, throw out the old, wet Shumka, put in something new, and throw out the faucet. What to put new? How about soundproofing? This thought flew in my head for about six months. Finally I made up my mind, bought the material in the spring and started. When I disassembled the interior, everything was dry!!! Only the carpet was slightly saturated with antifreeze. In general, the sound insulation process is a separate issue. In the process of studying the issue of sound insulation, I read all sorts of articles about installing acoustics and, in particular, making podiums for the front doors. This has already become an obsession. In the dream I dreamed of various forms, no, not female, but the forms of podiums, women sniffling nearby. And yet I decided, especially after two friends talked about their work.
And so is the shape of the podium. Either it’s simple and not beautiful - it’s a round bulge for a speaker, or the podium should be an extension of the pocket.
I drew it on a piece of paper, cut it out, attached it - something was missing, it looked unfinished. I imagined myself as a car interior designer and decided to radically redo the door trim, so that it would be leather like in foreign cars, and even with folds. Drew it, cut it out, attached it.
It seems to look normal. Let's get started.
What do we need? Young dermantine leather, which definitely stretches well, the fabric is beautiful - I chose blue fluffy to match the color of the car, soft material like paralon, glue, Macroflex (or any similar material), patience. If we buy anything later.
Since the shape of the door panel is slightly rounded at the top, the old panel does not fit; a new base needs to be cut out - from hardboard. And you will also need to file down the plastic trims. Isolon, left over from the sound insulation, was used as a soft material under the fabric and dermantin. One large piece was cut out along the entire contour of the panel and two pieces in the shape of the decorative overlays. I decided to simply sew these overlays to the fabric base, placing isolon. Don’t ask me in what order to attach what and how, I can’t explain it on my fingers, and I didn’t take any photos of this process. We glue the stitched sheathing with a thin layer of glue, so that it does not completely saturate the fabric, on top of the isolon; the isolon is already glued to the hardboard. After much torment this is what happened:
I wrapped and glued the edges of the fabric, and then went over it with a stapler for security.
The base is ready, now we need to paste over the podium itself and the top overlay.
Since there will be two podiums with pockets, and only one comes standard, I began to look for a second pocket for the second door. But I didn’t find my own, but I did find pockets from 41 Muscovites. There is no need to cut them, just screw them on and that’s it.
The podium frame was cut from 10mm thick plywood. For o
relief made a lot of holes. Correctly, speaker installation angles need to be selected long and hard, experimentally. But I didn’t intend to make a prize installation, and intended to “steer” the stage in the future with the help of tweeters, which is quite acceptable. Therefore, the shape and angle of inclination were chosen by eye.
The frame was held together with PVA and screws for good measure. Now all that remains is to fill the frame with foam. The frozen foam itself is soft and easily dented, so I used wet foam technology - when applying the foam, I dripped a little water into it and mixed it with a spatula and pushed it in places with my fingers. The latter should be done only with latex gloves; the foam is very difficult to wipe off, especially when it has hardened - only together with the skin.
With this technology of foam, two large cylinders were used - one liter each, and even that might not have been enough. Frozen foam, especially where it is loose, is easy to cut, but where it is very dense, it is difficult. So I sharpened it with a coarse file.
After processing, voids appeared in the foam. It needs to be puttied. AND
I used fiberglass putty. Since it dries quickly, it is necessary to putty in small portions. This took one 250g jar of two-component putty.
Since it was not possible to putty perfectly, and there was no need for more putty, no more putty was needed, but it was possible to continue. To make the surface of the podium at least a little soft, I covered everything with fabric from a coat. It stretches perfectly and will repeat the shape of the podium, while hiding the imperfections of the putty.


The podium is a round bulge for the speaker; it should be an extension of the pocket.
I drew it on a piece of paper, cut it out, attached it - something was missing, it looked unfinished. I imagined myself as a car interior designer and decided to radically redo the door trim, so that it would be leather like in foreign cars, and even with folds. Drew it, cut it out, attached it.


It seems to look normal. Let's get started.
What do we need? Young dermantine leather, which definitely stretches well, the fabric is beautiful - I chose a blue fluffy one to match the color of the car, soft material like paralon, glue, Macroflex (or any similar material), patience. If we buy anything later.
Since the shape of the door panel is slightly rounded at the top, the old panel does not fit; a new base must be cut out - from hardboard. And you will also need to file down the plastic trims. Isolon, left over from the sound insulation, was used as a soft material under the fabric and dermantin. One large piece was cut out along the entire contour of the panel and two pieces in the shape of the decorative overlays. I decided to simply sew these overlays to the fabric base, placing isolon. Don’t ask me in what order to attach what and how, I can’t explain it on my fingers, and I didn’t take any photos of this process. We glue the stitched sheathing with a thin layer of glue, so that it does not completely saturate the fabric, on top of the isolon; the isolon is already glued to the hardboard. After much torment this is what happened:


I wrapped and glued the edges of the fabric, and then went over it with a stapler for security.
The base is ready, now we need to paste over the podium itself and the top overlay.
Since there will be two podiums with pockets, and only one comes standard, I began to look for a second pocket for the second door. But I didn’t find my own, but I did find pockets from 41 Muscovites. There is no need to cut them, just screw them on and that’s it.
The podium frame was cut from 10mm thick plywood. To make it easier, I made a lot of holes. Correctly, speaker installation angles need to be selected long and hard, experimentally. But I didn’t intend to make a prize installation, and intended to “steer” the stage in the future with the help of tweeters, which is quite acceptable. Therefore, the shape and angle of inclination were chosen by eye.


The frame was held together with PVA and screws for good measure. Now all that remains is to fill the frame with foam. The frozen foam itself is soft and easily dented, so I used wet foam technology - when applying the foam, I dripped a little water into it and mixed it with a spatula and pushed it in places with my fingers. The latter should be done only with latex gloves; the foam is very difficult to wipe off, especially when it has hardened - only together with the skin.

With this technology of foam, two large cylinders were used - one liter each, and even that might not have been enough. Frozen foam, especially where it is loose, is easy to cut, but where it is very dense, it is difficult to cut. So I sharpened it with a coarse file.

After processing, voids appeared in the foam. It needs to be puttied. I used fiberglass putty. Since it dries quickly, it is necessary to putty in small portions. This took one 250g jar of two-component putty.

Since it was not possible to putty perfectly, and there was no need for more putty, no more putty was needed, but it was possible to continue. To make the surface of the podium at least a little soft, I covered everything with fabric from a coat. It stretches perfectly and will repeat the shape of the podium, while hiding the imperfections of the putty.

This intermediate result simply pleased me. But then the most difficult thing lay ahead - covering the podium with dermantine. First, I cut out a pattern from a rag, then transferred it to dermantin and began basting. This is where I almost lost my nerve and sent this whole idea to X... That’s why there’s only one photo of this process.

In the end, with my mother’s help and support, I sewed it and all that was left was to stretch it onto the podium. Dermantin easily stretches diagonally and across its fabric base - this must be taken into account. I glued the edges of the dermantine and nailed it with a stapler.

There are no folds on the surface, only one could not be avoided inside the pocket, but it is not visible from the outside.
Initially, in my VAZ 2101 with the “door cards” everything was very sad, they were frayed, bent and barely stayed in their rightful places. It was decided to solve the problem radically - to make the door trims ourselves, and use thicker plywood as a base than in the stock version. Why thicker? - to create proper acoustic design for the speakers in the doors. And use leather as a material. (it is also called dermantine).
Once it’s conceived, it must be implemented :) Let’s start with the components of our future door trims for your classic VAZ.
As a base, I took 4mm thick plywood, then applied the original VAZ 2101 door trim to it, traced it with a pencil and cut it along the contour with a jigsaw. Then I refined it along the contour with sandpaper. I also immediately cut a hole for the door handle (I deliberately did not make a hole for the window handle, since I have electric windows installed). The next step was marking the mounting holes - I applied the blank to the door and marked the holes in advance so as not to “fall into the void” in the future. And I actually drilled holes for the mounting bolts (I decided to abandon standard bolts, due to their lack of reliability + with a view to the good acoustic qualities of the door). It turned out like this:

Then a piece of foam backing was cut out (purchased from the same store as the link above):

The backing is two-layer, the first layer is a thin layer of foam rubber, the second layer is a rag, which is precisely intended for gluing to a wooden base. To the extent that foam rubber is very inconvenient to glue, because it, having a porous structure, absorbs glue and it is quite difficult to achieve uniformity.

Next, the future front side of the door trim was sewn from substitute leather (dermantine). It was possible to use a solid piece, but I wanted something special, so I went to the studio and there, for 500 rubles, they sewed everything for me as it should be, evenly and without flaws:

It was sewn with the so-called “French seam” (if interested, type this abbreviation into Yandex), firstly, it makes the seam more durable, and also looks beautiful:

Next, glue the backing onto the workpiece. The glue was purchased again - in the same store mentioned above, it’s called MAH, the glue holds on dead (judging by the reviews I also use it in professional tuning of interiors), here is the photo:

The gluing process looked like this:

Then we cut the cover in a circle, cut out the holes, and it turns out something like this:

Afterwards, we place our “front side” on a flat surface and cover it with our workpiece on top:

And, bending the edges and constantly tightening the skin (so that there are no folds), we fasten it with a stapler from the back side:


After making sure there are no creases:

We fasten the remaining two sides of our “front side” with a stapler, do not forget to tighten and check that everything is rated 5. At the very last moment, we cut off the excess dermantine, but without fanaticism, because there must be some kind of overlap, otherwise the staples will break through the leatherette:

We turn our creation over and rejoice at the impeccability of the result:

All that remains is to cut a hole(s) for the door handle (and the window handle, if you have manual ones), and also pierce/carefully cut through the leatherette in the places where the mounting bolts will be. And you can carry it to your VASE to put what was created in its rightful place.
And so - we rip off the old door trim, apply a new one and mark the locations of the mounting holes with a marker, drill the holes. To fasten the casing, I used a wonderful thing (which I discovered for the first time) - these are “rivet nuts”, they look like this:

According to the rules, they are riveted using special pliers, but these pliers cost incredible money. I successfully riveted them with a simple bolt, a couple of washers, pliers and a “ratchet” with a corresponding head (link to a detailed article: Riveting rivet nuts without expensive pliers). The result was these neat threaded holes:

I chose furniture bolts for fastening - they are hexagonal, neat, with a thin flat head and more or less fit. The only thing when I screwed them in was that I smeared the cap on the back side with lubricant, otherwise, as they twisted, they twisted the leatherette, trying to “screw it onto itself” (if you fasten it in the same way, you’ll understand when you try it without lubricant). In the end the result looked like this:

It seems to me that it turned out great, later I’ll work on the second side - the passenger side, as well as the rear doors, for now.
P.S. Almost a year has passed - field tests have shown that the above-described design is alive and will continue to live. But before gluing anything onto the workpiece, next time I’ll coat the plywood with an impregnation to prevent “mold and rot” - these are sold in construction stores, because the tightness of the VAZ doors of the classic model leaves much to be desired.
Thanks for the article, 31337Ghost
Source of the article: http://vaz2101.spb.ru